Recently I asked you to consider what would happen to you and your family in the event of a pandemic, natural disaster, or major terrorist attack. I ask you to imagine a scenario in which you find empty grocery store shelves, no running water or electricity, and no natural gas service. I find that most people have given some thought to this, and have made preparations, at least for the first few days following an emergency. Putting together an emergency kit is easy. However, preparations for long-term survival are not so easy. To make matters worse, people tend to believe that they’re ready, when in fact they are not. A plan, by itself, is not enough. It’s easy to say “I’ll plant a garden”, but do you have the tools and skills? Could you install a solar photovoltaic (PV) system and make it work? Do you have a plan to keep your home warm if you find yourself without utility-supplied heating fuel? Remember, in an emergency many of your neighbors will be looking for the same equipment and supplies that you’ll be looking for. The time to prepare is BEFORE an emergency.
If you have no previous gardening experience you’re likely to be disappointed with the results of your first attempt. In fact, it may take several seasons to become a good gardener. Even experienced gardeners continue to learn from season to season. Are you confident that you can grow a crop big enough to get you and your family through the winter? Do you have seeds? Can you keep insects and pests from ruining your crops? If you do manage to grow something, will you be able to preserve it for later consumption? Do you have the items needed for canning and preserving?
Solar panels, batteries, and the other components needed to build a solar electric system might be hard to find in an emergency. And, even if you can find the items you need, will you be able to build a system and use it efficiently? Unless you have previous experience, it’s unlikely that you’ll get the most out of this equipment. Beginner’s mistakes might result in damaged equipment and a system malfunction just when it’s needed the most.
I suspect that most of us are woefully unprepared for long-term survival and sustainable living, but fortunately we can do something about that. Here are a few suggestions:
Learn how to grow things now, don’t wait until spring. You’ll find plenty of information on-line. Consider plants that you can grow indoors, with limited space requirements. These might include herbs, wheat-grass, and dwarf tomato plants. Start a compost pile/bin. You’ll use the finished compost (humus), later to improve the soil. Plan your outdoor garden, and begin working the soil early in the spring. Save seeds from your successful crops. Saved seeds, from crops grown in your own backyard, will be better suited to your area than those bought from an out-of-the-area supplier. By the end of the season you’ll have plenty of ideas for doing things better next year.
If you have an acre or more of land, you might consider growing your own heating fuel. You can grow enough corn to heat your home for an entire winter on just one acre of land, but land alone is not enough. You’ll need equipment for planting, growing, and processing the corn as well as a way to securely store it for later use. You’ll have to protect your crop from insects and animals. This can be a monumental task, and perhaps overwhelming without the appropriate equipment. You might consider heating your home with wood if you can count on an abundant supply. Whichever method you choose, learn to use your stove or alternative heater efficiently and safely, and stock up on the appropriate fuel. Keep in mind that with an ordinary fireplace the heat goes up the chimney. The only warm spot in the home is directly in front of the fireplace. You’ll need a better strategy than that. If you’ve installed a heat exchanger, and if you have a dependable supply of electricity to power the blower, you’re in business.
Install and use an off-grid solar photovoltaic (PV) system. Monitor daily electricity production, and use. Shut down service from the power grid once in a while to check your system’s performance in a simulated grid power failure. You’ll learn from these simulations, you’ll adjust, and you’ll be better prepared for an actual emergency. Since your system probably won’t be big enough to supply all of your household needs for electricity, you’ll find ways to conserve. You’ll change to power-sipping compact fluorescent bulbs (cfl’s), for example. As you become more and more self-sufficient, you’ll be cutting your utility bills at the same time, a win-win situation.
Sustainable living skills need to be learned and practiced BEFORE an emergency. Unless you prepare in advance you probably won’t have the equipment, supplies, and skills needed for survival in the event of an emergency. Remember, you’re not preparing for the end of the world, you’re preparing for the future of the unknown. I hope you’ll take advantage of the information provided in this blog’s archives as you prepare. As always, I look forward to your comments and suggestions as I become more self-sufficient.
John
Showing posts with label Charge Controller. Show all posts
Showing posts with label Charge Controller. Show all posts
Wednesday, July 29, 2009


Saturday, May 30, 2009
My Off-Grid Photovoltaic System and This Blog
You might have noticed a decline in the number of posts to this blog since the first of this year. The decline is primarily due to the fact that my off-grid system hasn’t changed much over the past 6 months. I’ve slowed down because I now pretty much have what I want; a system that can meet my basic needs for electricity during a grid power failure, and one that provides enough energy to significantly lower my electric bill. I’ve also added automation to my system, providing additional protection for my batteries while optimizing power output.
I’ll probably never have enough PV-provided electricity to meet all of my needs, but I can get by pretty comfortably most of the time with the system I now have. It’s important to mention that my need for electricity during a grid-power failure varies with each season. Lengthy periods of cold weather provide the greatest challenge. In addition to the electricity needed for lighting, refrigeration, cooking, and communications, I’ll need electricity to keep my home warm. I can easily use up all of my stored energy during extended periods of cloud cover. With that in mind, I plan to add another PV panel this year, and one or more next year. Other than that, I have no other significant upgrade plans. I’ll maintain this slow but steady progress unless I see a dramatic increase in the cost of grid-supplied electricity, or a dramatic decrease in the cost of solar panels. I hope to drive an electric car within the next two years, and I would love to power it with solar. This is not practical now, with PV panels costing $5.00 per watt.
Here is an overview of my system:
Type: Off-grid
PV: 7 X 85, or 595 watts
Batteries: GC2’s wired for 12 volts, 900ah.
Spare Battery Bank: Marine Deep Cycle, 420ah.
Controller: TriStar 60 with meter and remote temperature probe
Inverter: Exeltec 12-volt, 1100-watt pure sine wave
Automation: Morningstar Relay Driver programmed to enable/disable the inverter and an Iota Transfer Switch
When I started installing solar PV, my primary goal was to become more self-sufficient, especially in the event of a major disaster. From time to time I need to remind myself that water and food are much more important than electric lights in the event of such a disaster. That’s why you’ll find so many articles about growing and preserving food in this blogs archives. You’ll also find articles concerning alternative heating, another necessity for surviving in the event of a loss of natural gas and grid-supplied electricity.
I hope that you’ll browse my archives now and then for ideas, and comment. Let’s learn from each other.
John
I’ll probably never have enough PV-provided electricity to meet all of my needs, but I can get by pretty comfortably most of the time with the system I now have. It’s important to mention that my need for electricity during a grid-power failure varies with each season. Lengthy periods of cold weather provide the greatest challenge. In addition to the electricity needed for lighting, refrigeration, cooking, and communications, I’ll need electricity to keep my home warm. I can easily use up all of my stored energy during extended periods of cloud cover. With that in mind, I plan to add another PV panel this year, and one or more next year. Other than that, I have no other significant upgrade plans. I’ll maintain this slow but steady progress unless I see a dramatic increase in the cost of grid-supplied electricity, or a dramatic decrease in the cost of solar panels. I hope to drive an electric car within the next two years, and I would love to power it with solar. This is not practical now, with PV panels costing $5.00 per watt.
Here is an overview of my system:
Type: Off-grid
PV: 7 X 85, or 595 watts
Batteries: GC2’s wired for 12 volts, 900ah.
Spare Battery Bank: Marine Deep Cycle, 420ah.
Controller: TriStar 60 with meter and remote temperature probe
Inverter: Exeltec 12-volt, 1100-watt pure sine wave
Automation: Morningstar Relay Driver programmed to enable/disable the inverter and an Iota Transfer Switch
When I started installing solar PV, my primary goal was to become more self-sufficient, especially in the event of a major disaster. From time to time I need to remind myself that water and food are much more important than electric lights in the event of such a disaster. That’s why you’ll find so many articles about growing and preserving food in this blogs archives. You’ll also find articles concerning alternative heating, another necessity for surviving in the event of a loss of natural gas and grid-supplied electricity.
I hope that you’ll browse my archives now and then for ideas, and comment. Let’s learn from each other.
John
Friday, October 24, 2008
I've Installed Off-Grid Solar - Why Didn't my Electric Bill go Down?
It’s interesting to talk about alternative electricity with those who live in areas where electric rates are high. They tend to know all about energy-efficient lighting and appliances. They know how to conserve, and they understand the benefits of energy efficiency-related home improvements. They’ve either installed a small photovoltaic (PV) system, or they’re planning to install one in the near future. They understand how PV systems work, and they’re tired of articles telling them to keep the panels clean and avoid shading. Those things are intuitive. What they’re really looking for is a way to reduce their electric bill.
My approach is simple; I use as much free energy from the sun as my system can supply, and switch to grid-supplied electricity only when necessary. This strategy may seem odd to those who are conditioned to think of a battery-based system as a backup to the grid. It’s counterintuitive. The first step is to get comfortable with the concept of using the power grid as a backup system.
When both sources of electricity are available, make sure that no one in the house uses grid power. Design the system to switch automatically, with battery power as the default. Switch to grid power ONLY when batteries are depleted. Many inverters have this capability built-in, but you can purchase an Automatic Transfer Switch if yours does not. By transferring all lights and electrical outlets in your home to battery power, no one has access to grid power, and therefore no one will be running up your electric bill by accident or without your knowledge. If your PV system is small, high-power items will have to be excluded. Your central air conditioner, for example, will probably not be switched to battery power. Once your batteries become discharged, late at night perhaps, lights and outlets in your home will be switched to grid power. Fortunately, this is the time when electricity use will be at its lowest level for most households.
Inverters draw energy from the batteries until battery voltage drops to a point where the inverter can no longer function. Typically, the cut-off point is about 10.5 volts (for a 12 volt inverter). Unfortunately, allowing batteries to discharge that much can be harmful to them. You’ll need another way to switch your inverter off. And, once the batteries are drained to that level, they should be recharged fully before reconnecting loads. Reconnecting batteries to the load too soon could result in chronic undercharging, which would shorten the life of the batteries. Some charge controllers allow you to configure disconnect and reconnect set points, or they have that functionality available as an option. Look for that feature in the equipment you’ll purchase. With these things in mind, let’s review system functionality:
The sun rises in the morning, and batteries become fully charged.
Selected AC loads are switched to battery power via the inverter.
The sun sets in the evening and battery voltage declines.
When battery voltage falls to a preset level, AC loads are switched to grid power.
The cycle repeats each day.
The concept I’ve described here is simple, but effective. It eliminates the waste that would occur if you were to switch manually. After all, you’re not setting at the controls 24/7 watching for the ideal time to switch, are you? By switching automatically you might save hundreds of dollars each year on your electric bill. If your PV system is small, start with one or two rooms and add rooms as you add solar panels and batteries to your system. An electrician can easily wire in additional circuits as your system grows.
I use this strategy in my home, with a chest freezer and refrigerator as the only loads. Instead of tying into my existing house wiring, I’ve added separate wiring to those appliances. Because I didn’t tie in to the existing house wiring, I saved myself the cost of having an electrician do the wiring. I’ve observed that my system switches to battery power on sunny days at about 10:30am. It switches back to grid-supplied AC at about midnight. It’s easy to see that I could use more batteries and solar panels. I plan to expand, and I hope that by the end of next year I’ll be able to add to the existing loads. By making sure that the size of the load exceeds the capacity of the PV system I know that I’m getting as much power as the system is capable of producing.
The system as described should cut your electric bill considerably, but you can cut it even more if you watch for opportunities. A properly designed system should include enough PV capacity to fully charge your battery bank each day, and excess energy is often wasted. Watch for opportunities to use that otherwise wasted energy. For maximum efficiency, use appliances mid-day with power coming directly from the solar panels.
The way to get the most from any Off-Grid PV system is not to let any solar-generated electricity go to waste.

An automatic transfer switch should be installed by a properly trained and licensed electrician.
John
My approach is simple; I use as much free energy from the sun as my system can supply, and switch to grid-supplied electricity only when necessary. This strategy may seem odd to those who are conditioned to think of a battery-based system as a backup to the grid. It’s counterintuitive. The first step is to get comfortable with the concept of using the power grid as a backup system.
When both sources of electricity are available, make sure that no one in the house uses grid power. Design the system to switch automatically, with battery power as the default. Switch to grid power ONLY when batteries are depleted. Many inverters have this capability built-in, but you can purchase an Automatic Transfer Switch if yours does not. By transferring all lights and electrical outlets in your home to battery power, no one has access to grid power, and therefore no one will be running up your electric bill by accident or without your knowledge. If your PV system is small, high-power items will have to be excluded. Your central air conditioner, for example, will probably not be switched to battery power. Once your batteries become discharged, late at night perhaps, lights and outlets in your home will be switched to grid power. Fortunately, this is the time when electricity use will be at its lowest level for most households.
Inverters draw energy from the batteries until battery voltage drops to a point where the inverter can no longer function. Typically, the cut-off point is about 10.5 volts (for a 12 volt inverter). Unfortunately, allowing batteries to discharge that much can be harmful to them. You’ll need another way to switch your inverter off. And, once the batteries are drained to that level, they should be recharged fully before reconnecting loads. Reconnecting batteries to the load too soon could result in chronic undercharging, which would shorten the life of the batteries. Some charge controllers allow you to configure disconnect and reconnect set points, or they have that functionality available as an option. Look for that feature in the equipment you’ll purchase. With these things in mind, let’s review system functionality:
The sun rises in the morning, and batteries become fully charged.
Selected AC loads are switched to battery power via the inverter.
The sun sets in the evening and battery voltage declines.
When battery voltage falls to a preset level, AC loads are switched to grid power.
The cycle repeats each day.
The concept I’ve described here is simple, but effective. It eliminates the waste that would occur if you were to switch manually. After all, you’re not setting at the controls 24/7 watching for the ideal time to switch, are you? By switching automatically you might save hundreds of dollars each year on your electric bill. If your PV system is small, start with one or two rooms and add rooms as you add solar panels and batteries to your system. An electrician can easily wire in additional circuits as your system grows.
I use this strategy in my home, with a chest freezer and refrigerator as the only loads. Instead of tying into my existing house wiring, I’ve added separate wiring to those appliances. Because I didn’t tie in to the existing house wiring, I saved myself the cost of having an electrician do the wiring. I’ve observed that my system switches to battery power on sunny days at about 10:30am. It switches back to grid-supplied AC at about midnight. It’s easy to see that I could use more batteries and solar panels. I plan to expand, and I hope that by the end of next year I’ll be able to add to the existing loads. By making sure that the size of the load exceeds the capacity of the PV system I know that I’m getting as much power as the system is capable of producing.
The system as described should cut your electric bill considerably, but you can cut it even more if you watch for opportunities. A properly designed system should include enough PV capacity to fully charge your battery bank each day, and excess energy is often wasted. Watch for opportunities to use that otherwise wasted energy. For maximum efficiency, use appliances mid-day with power coming directly from the solar panels.
The way to get the most from any Off-Grid PV system is not to let any solar-generated electricity go to waste.

An automatic transfer switch should be installed by a properly trained and licensed electrician.
John
Tuesday, October 07, 2008
System Automation for a Spare Battery Bank
Having recently replaced my PV system’s battery bank, I had to decide what to do with the still-good older batteries. Connecting batteries of different types and ages together is not a good idea; it shortens the life of the newer batteries. My choice was to install a switch, allowing me to add and remove the old bank from the charge controller/inverter circuit. When I want to charge the old bank, I can simply switch it in. I can also switch it in when I need extra amp-hours, during a grid power failure for example. I can switch it out the rest of the time, keeping it from dragging down the new battery bank.
My plan worked fine for awhile, but then I neglected to check the batteries for a few days. To my horror, I found that the battery voltage dropped below 10 volts. Allowing batteries to deeply discharge, and remain in that state for an extended period of time, can ruin them. I knew I had to do something else. I wanted to use energy from the sun to keep both battery banks charged, but I wanted the main battery bank to have top priority. Here’s what I did:
The problem was easily solved by adding a relay to an unused channel of my Morningstar Relay Driver. I’ve programmed the relay driver to monitor the main battery bank voltage. When the main battery bank is nearly fully charged, I divert excess current to the older battery bank. Programming voltage thresholds is done by temporarily connecting a computer to the relay driver and running a simple configuration program. Here are my settings for the spare battery bank relay:
Turn on relay when main battery voltage > 14.40 volts.
This establishes the main battery bank as the top charging priority. Power will be diverted to the spare battery bank ONLY when the main battery bank is nearly fully charged.
Turn off relay when main battery voltage < 14.00 volts.
Turning off the relay disconnects the spare battery bank from the inverter and charge controller, preventing it from discharging through the load.
The main battery bank provides power to the loads day and night, cutting my electric bill. I’ve programmed the relay driver to remove the load from the main bank when its state-of-charge (SOC) drops below 80%. This happens at night, or when it’s cloudy, leaving me with little surplus power to use in the event of a grid power failure. However, by keeping the spare battery bank fully charged I now have the best of both worlds, lower electric bills and reserve energy to serve in the event of an emergency. A simplified diagram of my system is shown below. Relay 1 switches the inverter on and off, while relay 2 switches the spare battery bank in and out of the circuit.

John
My plan worked fine for awhile, but then I neglected to check the batteries for a few days. To my horror, I found that the battery voltage dropped below 10 volts. Allowing batteries to deeply discharge, and remain in that state for an extended period of time, can ruin them. I knew I had to do something else. I wanted to use energy from the sun to keep both battery banks charged, but I wanted the main battery bank to have top priority. Here’s what I did:
The problem was easily solved by adding a relay to an unused channel of my Morningstar Relay Driver. I’ve programmed the relay driver to monitor the main battery bank voltage. When the main battery bank is nearly fully charged, I divert excess current to the older battery bank. Programming voltage thresholds is done by temporarily connecting a computer to the relay driver and running a simple configuration program. Here are my settings for the spare battery bank relay:
Turn on relay when main battery voltage > 14.40 volts.
This establishes the main battery bank as the top charging priority. Power will be diverted to the spare battery bank ONLY when the main battery bank is nearly fully charged.
Turn off relay when main battery voltage < 14.00 volts.
Turning off the relay disconnects the spare battery bank from the inverter and charge controller, preventing it from discharging through the load.
The main battery bank provides power to the loads day and night, cutting my electric bill. I’ve programmed the relay driver to remove the load from the main bank when its state-of-charge (SOC) drops below 80%. This happens at night, or when it’s cloudy, leaving me with little surplus power to use in the event of a grid power failure. However, by keeping the spare battery bank fully charged I now have the best of both worlds, lower electric bills and reserve energy to serve in the event of an emergency. A simplified diagram of my system is shown below. Relay 1 switches the inverter on and off, while relay 2 switches the spare battery bank in and out of the circuit.

John
Friday, September 26, 2008
Big Performance from a Small Off-Grid System
Gasoline prices have soared over the past couple of years, and some believe that electricity rates will soon follow. When that happens, alternatives like PV (photovoltaic) systems will become an attractive option. The surge in demand for solar panels will result in higher prices, and only the well-to-do will be able to install systems large enough to meet the needs of an entire household. The average home owner will be forced to pay the high utility rates, or to learn to get by with a small PV system. The good news is that you can get by with a smaller PV system than you might have imagined, but it’s going to take some “out-of-the-box” thinking.
Much has been written about the benefits of home improvements such as adding insulation, replacing windows and doors, efficient lighting and appliances, the elimination of phantom loads, and passive solar improvements. Alternatives to electric heating and cooling are also important. These are logical, and often necessary, prerequisites to PV system implementation, and especially important to anyone wanting to get by with a small system. Since those topics have been discussed at length elsewhere, this discussion will be limited to getting the most from a small PV system.

The daily capacity of a PV system can be calculated by multiplying the capacity of the PV array, in watts, by the number of hours of peak sunlight. A PV panel array consisting of five one hundred watt panels, for example, can produce 2000 watt-hours in a four-hour period. That’s 500 watts times 4 hours. It is widely accepted as fact that an off-grid PV system with batteries will be 65% efficient, lowering the expected daily production in this case from 2000 watt-hours to just 1300 watt-hours. Now that you know the basics, let’s explore some ideas for getting most from a small PV system:
1. Load shifting
An off-grid system is least efficient when it is used to charge batteries. The inefficiencies associated with converting energy, storing it, and converting the stored energy back to electricity results in a huge energy loss. The obvious solution therefore is to use electricity directly from the solar panels as it is produced, instead of storing it in batteries for use at a later time. Doing the laundry, running a vacuum cleaner, and cooking are some of the obvious tasks you can do in the daytime, but other strategies are not so obvious.

A well-insulated chest freezer will keep things frozen for many hours in the event of a power loss. Consider putting your chest freezer on a timer, limiting its operating hours to daytime. This will require a little experimentation, as you don’t want food to partially thaw each night.
To improve its efficiency, move your chest freezer to the coolest part of the house, perhaps the basement. Allow plenty of room for air circulation near the condenser to improve operating efficiency, don't limit it to the two or three inches that the manual suggests.
2. Eliminate unnecessary appliances
Could you get by without a refrigerator? You certainly could if you had to, and you’ll reduce the load on your PV system by 1000 to 3000 watt-hours each day. You’ll be able to eliminate a dozen or more solar panels from your array, saving a small fortune. I spoke to a friend recently who, after his refrigerator failed, continued to use it to keep items cold by using ice from his chest freezer. He used his chest freezer to produce ice, and placed that ice in his refrigerator. Milk jugs provided a convenient way to do it, and he cycled three, one gallon jugs, from his freezer to his refrigerator each day.
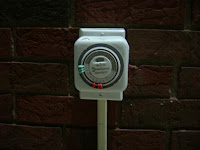
Perhaps you’re not quite ready to shut down your refrigerator full-time. Instead, why not put it on a timer? Shutting it down for a few hours each night will reduce the system load significantly.
Converting a chest freezer to a super-efficient refrigerator is another strategy you might consider. A thermostat mounted inside the freezer switches AC power to the freezer on and off as needed. No significant modifications to the chest freezer are necessary.
3. Add diversion load control to your PV system

If you monitor your PV system during the day you probably find that once the batteries are fully charged, you have a lot of excess energy available that doesn’t get used. Putting this previously wasted energy to use can significantly increase the usefulness of a small PV system. Adding diversion load control to your system is one way to tap into that extra energy. Some charge controllers can be used as diversion load controllers, but you can also use a PLC (Programmable Logic Controller) for the task. I use a Morningstar Relay Driver, a much less expensive option.
Often, systems are designed to use the extra energy to pre-heat water, but that’s probably the least-efficient way to use it. Using the sun to heat water directly makes more sense. If your home uses a cistern for its water supply, using this excess energy to pump water is a much better idea. It is far better to use excess energy for this task than to have to pump water at night, due to demand, using energy from batteries.
You could also use the excess energy to charge a spare battery bank. The spare battery bank might be used to power some DC loads, 12-volt dc lights for example. Using this surplus power for DC loads eliminates the conversion loss that you would otherwise experience by running a DC to AC inverter. This might allow you to turn off your inverter, perhaps all night long, saving yourself the power it consumes when idling.
4. Make Peukert’s Law work to your advantage
According to Peukert, a lightly loaded battery bank operates at higher efficiency than a heavily loaded battery bank. Looking at this another way; if you increase the size of the battery bank, without increasing the load, efficiency improves. Take advantage of this phenomenon by making your battery bank larger than necessary. As a bonus, your batteries will last longer because they’ll be stressed less.
Avoid using two or more high-power appliances at the same time. Making toast, while using the microwave oven, is an example of this. Heavy current from the battery bank results in lower efficiency, according to Peukert.
Conclusion
Anyone who’s ever struggled to get through an extended grid power failure knows that electricity is more than simply a matter of comfort and convenience. While it’s a necessity for some, it would be hard for any of us to get by without it. Imagine doing without lights on a long winter evening, or not having the ability to keep food refrigerated. Imagine doing without air conditioning, and not even having an electric fan to circulate fresh air.
Use these strategies to the extent that you can. You might start by adding the ability to log system data. The ability to log data will help you determine if system improvements and modifications are beneficial. Adding automation to your system is the logical next step. This allows you to shift loads and divert power when it is beneficial to do so. And most importantly, be on the lookout for other ways to lighten the load and improve system performance. Please share your ideas with the rest of us, in the form of a comment, so that we can all learn from each other.
John
Much has been written about the benefits of home improvements such as adding insulation, replacing windows and doors, efficient lighting and appliances, the elimination of phantom loads, and passive solar improvements. Alternatives to electric heating and cooling are also important. These are logical, and often necessary, prerequisites to PV system implementation, and especially important to anyone wanting to get by with a small system. Since those topics have been discussed at length elsewhere, this discussion will be limited to getting the most from a small PV system.

The daily capacity of a PV system can be calculated by multiplying the capacity of the PV array, in watts, by the number of hours of peak sunlight. A PV panel array consisting of five one hundred watt panels, for example, can produce 2000 watt-hours in a four-hour period. That’s 500 watts times 4 hours. It is widely accepted as fact that an off-grid PV system with batteries will be 65% efficient, lowering the expected daily production in this case from 2000 watt-hours to just 1300 watt-hours. Now that you know the basics, let’s explore some ideas for getting most from a small PV system:
1. Load shifting
An off-grid system is least efficient when it is used to charge batteries. The inefficiencies associated with converting energy, storing it, and converting the stored energy back to electricity results in a huge energy loss. The obvious solution therefore is to use electricity directly from the solar panels as it is produced, instead of storing it in batteries for use at a later time. Doing the laundry, running a vacuum cleaner, and cooking are some of the obvious tasks you can do in the daytime, but other strategies are not so obvious.

A well-insulated chest freezer will keep things frozen for many hours in the event of a power loss. Consider putting your chest freezer on a timer, limiting its operating hours to daytime. This will require a little experimentation, as you don’t want food to partially thaw each night.
To improve its efficiency, move your chest freezer to the coolest part of the house, perhaps the basement. Allow plenty of room for air circulation near the condenser to improve operating efficiency, don't limit it to the two or three inches that the manual suggests.
2. Eliminate unnecessary appliances
Could you get by without a refrigerator? You certainly could if you had to, and you’ll reduce the load on your PV system by 1000 to 3000 watt-hours each day. You’ll be able to eliminate a dozen or more solar panels from your array, saving a small fortune. I spoke to a friend recently who, after his refrigerator failed, continued to use it to keep items cold by using ice from his chest freezer. He used his chest freezer to produce ice, and placed that ice in his refrigerator. Milk jugs provided a convenient way to do it, and he cycled three, one gallon jugs, from his freezer to his refrigerator each day.

Perhaps you’re not quite ready to shut down your refrigerator full-time. Instead, why not put it on a timer? Shutting it down for a few hours each night will reduce the system load significantly.
Converting a chest freezer to a super-efficient refrigerator is another strategy you might consider. A thermostat mounted inside the freezer switches AC power to the freezer on and off as needed. No significant modifications to the chest freezer are necessary.
3. Add diversion load control to your PV system

If you monitor your PV system during the day you probably find that once the batteries are fully charged, you have a lot of excess energy available that doesn’t get used. Putting this previously wasted energy to use can significantly increase the usefulness of a small PV system. Adding diversion load control to your system is one way to tap into that extra energy. Some charge controllers can be used as diversion load controllers, but you can also use a PLC (Programmable Logic Controller) for the task. I use a Morningstar Relay Driver, a much less expensive option.
Often, systems are designed to use the extra energy to pre-heat water, but that’s probably the least-efficient way to use it. Using the sun to heat water directly makes more sense. If your home uses a cistern for its water supply, using this excess energy to pump water is a much better idea. It is far better to use excess energy for this task than to have to pump water at night, due to demand, using energy from batteries.
You could also use the excess energy to charge a spare battery bank. The spare battery bank might be used to power some DC loads, 12-volt dc lights for example. Using this surplus power for DC loads eliminates the conversion loss that you would otherwise experience by running a DC to AC inverter. This might allow you to turn off your inverter, perhaps all night long, saving yourself the power it consumes when idling.
4. Make Peukert’s Law work to your advantage
According to Peukert, a lightly loaded battery bank operates at higher efficiency than a heavily loaded battery bank. Looking at this another way; if you increase the size of the battery bank, without increasing the load, efficiency improves. Take advantage of this phenomenon by making your battery bank larger than necessary. As a bonus, your batteries will last longer because they’ll be stressed less.
Avoid using two or more high-power appliances at the same time. Making toast, while using the microwave oven, is an example of this. Heavy current from the battery bank results in lower efficiency, according to Peukert.
Conclusion
Anyone who’s ever struggled to get through an extended grid power failure knows that electricity is more than simply a matter of comfort and convenience. While it’s a necessity for some, it would be hard for any of us to get by without it. Imagine doing without lights on a long winter evening, or not having the ability to keep food refrigerated. Imagine doing without air conditioning, and not even having an electric fan to circulate fresh air.
Use these strategies to the extent that you can. You might start by adding the ability to log system data. The ability to log data will help you determine if system improvements and modifications are beneficial. Adding automation to your system is the logical next step. This allows you to shift loads and divert power when it is beneficial to do so. And most importantly, be on the lookout for other ways to lighten the load and improve system performance. Please share your ideas with the rest of us, in the form of a comment, so that we can all learn from each other.
John
Friday, September 19, 2008
Off-grid Systems and Off-grid People
“To acquire knowledge, one must study; but to acquire wisdom, one must observe”. Marilyn vos Savant
Some off-grid systems and the people who use them:
I have an off-grid photovoltaic (PV) system, but since I’m connected to the electrical grid I can’t honestly say that I know what off-grid living is like. My system powers some loads on a daily basis, and serves as an emergency backup system, but I rely on the power grid for most of my everyday electricity needs. The closest I’ve come to real off-grid living has been during those times when my grid power failed. To understand what off-grid living is really like it’s helpful to peek into the lives of those who actually live off-grid on a full-time basis.
An off-grid lifestyle can range from primitive to luxurious, depending upon the size of the system. While some are happy with a minimalist lifestyle, it’s common to find others who after attempting to live off-grid, have become disillusioned upon realizing just how much work is involved. Some give up, and others enlarge their systems until they achieve an acceptable comfort level. On the other end of the spectrum are off-gridders who want all of the conveniences that their well-connected counterparts in the city enjoy. This group includes the well-to-do who choose to live in an area where utility services are unavailable. Most off-gridders, I suppose, fall somewhere in-between primitive and luxurious.
With these things in mind, let’s look into the lives of some off-grid people and their systems:
#1. Can you guess which country has the most residential solar PV systems installed? It’s Kenya. PV systems are replacing kerosene lamps in remote villages, greatly improving the quality of life of the residents. Typically, these small systems are only able to provide a few hours of light each night, but the importance of the elimination of fire hazards and indoor air quality improvements cannot be overstated. Because children can study longer into the evening with the extra light, these small systems also have an educational benefit.
#2. Here in the United States, Ward’s solar PV system was built for less than $700.00. It provides all of the electrical needs of this bachelor in his remote cabin, including lights, TV, VCR, and a boombox. Ward uses a wood-burning stove for heat, and a propane refrigerator. He has no indoor plumbing. His system includes a 75-watt solar panel, four batteries, a charge controller, and a 350-watt inverter.
#3. It would be a disservice to Karen to limit this discussion to her PV system. Karen transformed a 5-acre site in the Mojave desert to a comfortable homestead. Among her accomplishments Karen installed a septic system and a 4000 gallon water tank. She renovated an old cabin, including a passive solar system of her own design. Karen uses a wood stove for heat, and propane for cooking and refrigeration. And yes, she put in a solar PV system. Her system includes 400-watts of PV, 880ah of battery capacity, a charge controller, and a 3500-watt inverter. A system of this size can be built for less than $3000.00. Because Karen’s system is larger than Wards, she can do much more. Her capabilities include pumping water, running a vacuum cleaner, and using kitchen appliances.
Although Ward and Karen may be satisfied with what they have, a typical family would probably struggle to get by with such limitations. Some might opt for the prepackaged 2000 watt off-grid PV system described below. The cost of the entire system, including batteries and wiring, is in the neighborhood of $20,000.00. A system of this size will allow the use of a washer and dryer, and almost any electrical device imaginable. In spite of the size of this system, the average family of four may experience shortages of electricity from time to time. Energy efficient construction, efficient heating and cooling systems and efficient appliances will help, but some homeowners will opt for a generator to make up for periods of extended cloud cover.
System Specifications:
PV: 2000 Watts
Batteries: 6000ah
Pre-Wired Power Center with 4,400 Watts 120/240VAC
Need even more electricity? Obviously you can have as much as your budget and space will allow. Your decision to live off-grid means that you’ll have to maintain your own power systems, but it’s really not that difficult. You’ll have sophisticated equipment that automates some of the maintenance tasks and alerts you to small problems before they become big ones. You’ll know the status of your batteries, and the amount of stored power at a glance. If you choose to install a generator as a backup, it can be set to start up automatically in the event that it’s needed.
Ward and Karen may be thought of as being on the fringe of society now, but that notion will change someday. Declining fossil fuels and an increased awareness of the harm we’re doing to our environment will someday make a change to renewable technologies a necessity, not just a good idea. Folks like Ward and Karen will be typical, not the exception. We’ll all be better off when that happens.
For more off-grid systems and people, click on this link: http://offgrid.homestead.com/OffGridersPage.html
Here’s another site that showcases off-grid systems and people: http://gallery.altenergystore.com/main.php?g2_page=1
John
Some off-grid systems and the people who use them:
I have an off-grid photovoltaic (PV) system, but since I’m connected to the electrical grid I can’t honestly say that I know what off-grid living is like. My system powers some loads on a daily basis, and serves as an emergency backup system, but I rely on the power grid for most of my everyday electricity needs. The closest I’ve come to real off-grid living has been during those times when my grid power failed. To understand what off-grid living is really like it’s helpful to peek into the lives of those who actually live off-grid on a full-time basis.
An off-grid lifestyle can range from primitive to luxurious, depending upon the size of the system. While some are happy with a minimalist lifestyle, it’s common to find others who after attempting to live off-grid, have become disillusioned upon realizing just how much work is involved. Some give up, and others enlarge their systems until they achieve an acceptable comfort level. On the other end of the spectrum are off-gridders who want all of the conveniences that their well-connected counterparts in the city enjoy. This group includes the well-to-do who choose to live in an area where utility services are unavailable. Most off-gridders, I suppose, fall somewhere in-between primitive and luxurious.
With these things in mind, let’s look into the lives of some off-grid people and their systems:
#1. Can you guess which country has the most residential solar PV systems installed? It’s Kenya. PV systems are replacing kerosene lamps in remote villages, greatly improving the quality of life of the residents. Typically, these small systems are only able to provide a few hours of light each night, but the importance of the elimination of fire hazards and indoor air quality improvements cannot be overstated. Because children can study longer into the evening with the extra light, these small systems also have an educational benefit.
#2. Here in the United States, Ward’s solar PV system was built for less than $700.00. It provides all of the electrical needs of this bachelor in his remote cabin, including lights, TV, VCR, and a boombox. Ward uses a wood-burning stove for heat, and a propane refrigerator. He has no indoor plumbing. His system includes a 75-watt solar panel, four batteries, a charge controller, and a 350-watt inverter.
#3. It would be a disservice to Karen to limit this discussion to her PV system. Karen transformed a 5-acre site in the Mojave desert to a comfortable homestead. Among her accomplishments Karen installed a septic system and a 4000 gallon water tank. She renovated an old cabin, including a passive solar system of her own design. Karen uses a wood stove for heat, and propane for cooking and refrigeration. And yes, she put in a solar PV system. Her system includes 400-watts of PV, 880ah of battery capacity, a charge controller, and a 3500-watt inverter. A system of this size can be built for less than $3000.00. Because Karen’s system is larger than Wards, she can do much more. Her capabilities include pumping water, running a vacuum cleaner, and using kitchen appliances.
Although Ward and Karen may be satisfied with what they have, a typical family would probably struggle to get by with such limitations. Some might opt for the prepackaged 2000 watt off-grid PV system described below. The cost of the entire system, including batteries and wiring, is in the neighborhood of $20,000.00. A system of this size will allow the use of a washer and dryer, and almost any electrical device imaginable. In spite of the size of this system, the average family of four may experience shortages of electricity from time to time. Energy efficient construction, efficient heating and cooling systems and efficient appliances will help, but some homeowners will opt for a generator to make up for periods of extended cloud cover.
System Specifications:
PV: 2000 Watts
Batteries: 6000ah
Pre-Wired Power Center with 4,400 Watts 120/240VAC
Need even more electricity? Obviously you can have as much as your budget and space will allow. Your decision to live off-grid means that you’ll have to maintain your own power systems, but it’s really not that difficult. You’ll have sophisticated equipment that automates some of the maintenance tasks and alerts you to small problems before they become big ones. You’ll know the status of your batteries, and the amount of stored power at a glance. If you choose to install a generator as a backup, it can be set to start up automatically in the event that it’s needed.
Ward and Karen may be thought of as being on the fringe of society now, but that notion will change someday. Declining fossil fuels and an increased awareness of the harm we’re doing to our environment will someday make a change to renewable technologies a necessity, not just a good idea. Folks like Ward and Karen will be typical, not the exception. We’ll all be better off when that happens.
For more off-grid systems and people, click on this link: http://offgrid.homestead.com/OffGridersPage.html
Here’s another site that showcases off-grid systems and people: http://gallery.altenergystore.com/main.php?g2_page=1
John
Wednesday, August 27, 2008
Design and Build an Off-Grid Solar Electric System
Anyone with a basic understanding of electricity and good mechanical skills can design and build a solar photovoltaic (PV) system. Here, condensed into a few easy steps, is what you need to know.
Overview
There are two basic types of solar PV systems, off-grid and grid-tied. An off-grid system uses batteries, while batteries are optional in a grid-tied system. In this article we’ll be discussing off-grid systems. An off-grid system uses solar photovoltaic (PV) panels to turn sunlight into electricity, and stores that electricity in batteries for later use. Battery charging must be done in a controlled manner to protect them from damage, and for efficiency and safety. The stored energy must be converted to AC voltage in order to power ordinary household appliances.
Building a system large enough to meet your daily needs for electricity can be an expensive project. For most people, reducing the load by improving energy efficiency will be more cost effective than building a system big enough to handle a heavy load. Replacing incandescent lights with compact fluorescent (CFL’s), and upgrading to energy-efficient appliances are a couple of things you can do that will pay off in the long run. Having done that, you’re ready to start the design phase.
Step 1. Determine your daily needs.
List the electrical requirements of each device that you plan to power with the PV system. Example:
A 13-watt bulb in use for 5 hours each day (average) uses 13 watts times 5 hours, or 65 watt/hours per day.
Enter the information for each device into a chart as shown below:

Your total energy needs are the sum of the individual requirements of all devices, or 4985 watt/hours per day in this example. You may choose to build a system to meet all of your needs, or choose instead to build a system to meet a portion of your needs.
Tip: If you don’t know the electrical requirements of a particular appliance or device, an inexpensive Kill-A-Watt meter can help you find out. Click (HERE) for more information.
Step 2. Determine the amount of PV needed.
PV panels are rated in watts. One 100-watt panel produces the same amount of power as two 50-watt panels. If you get 4 hours of sunlight each day, a 100-watt panel is capable of producing 4 times 100, or 400-watt/hours of power daily. The example above lists your needs at almost 5000 watt/hours per day. Dividing 5000 by 400 shows that you’ll need twelve and a half 100-watt panels to meet your daily needs. To make up for system losses, and because you’ll probably want all panels to be the same size, you should go at least 20% bigger, opting for 15 panels. You might want even more panels to compensate for extended periods of cloud cover.
Step 3. Planning your battery bank.
Batteries are rated in amp/hours. Begin by converting watt/hours to amp/hours by dividing watt/hours by 12 (the battery voltage). In this example, the 4985 watt/hours that you need divided by 12 equals about 415 amp/hours. Since discharging batteries beyond 50% of their capacity will shorten their life, you’ll need a battery bank rated at no less than 830 amp/hours (in this example). Additionally, you’ll have to increase the size of your battery bank by about 20% to compensate for conversion losses. Having done that, you should have enough battery capacity to get you by for one full day. Ten 100 amp/hour batteries connected in parallel will do the job in this example, but if you want to compensate for extended periods of cloud cover you’ll need more. In addition to keeping your equipment running in the event of extended cloud cover, over-sizing the battery bank helps to extend the life of the batteries as a result of less-aggressive use.
As you shop for batteries, be sure to select those designed for deep cycle applications, not automotive batteries. Batteries designed for golf-carts, floor scrubbers, and forklifts are all good choices. The most expensive batteries tend to have the longest lifespan. Your bank of batteries will be wired to provide 12, 24, or 48 volts. More about that later.
Step 4. Select an inverter.
An inverter converts the low DC voltage from your battery bank to 120-volts AC. To determine the size of the inverter needed, add up the power requirements of all of the loads that you intend to run simultaneously. The total load in Step 1 was just under 5000-watts, but it’s unlikely that you’ll ever use all of those devices at the same time. You might, however, use the microwave oven and toaster at the same time, a total of 1900 watts. You might also have a few lights on at the same time. In this example, an inverter rated at 2000-watts would just meet your needs.
There are two basic types of inverters, modified sine wave and true sine wave. Modified sine wave inverters are much less expensive, but some equipment may not work well with modified sine waves. Motors may overheat and run at the wrong speed, and sensitive electronic equipment can be damaged. For best results, I highly recommend a true sine wave inverter.
The choice of an inverter will also influence another important design decision. Inverters typically accept an input voltage of 12, 24, or 48 volts. Generally speaking, a 12-volt inverter would be the best choice for a small system, while a 24 or 48 volt inverter would be better for a large system.
Step 5. Select a Charge Controller.
A charge controller efficiently controls the battery charging voltage and current, and keeps the batteries from overcharging. If you choose to build a small system, you need not get an expensive charge controller. A single PV panel can produce no more than 5 to 10 amps of current, and just about any charge controller will be able to handle that. A large PV system may require you to use more than one charge controller, splitting the PV panels into two or more sections. Your charge controller should include a battery temperature probe. The charge controller cannot efficiently charge batteries unless it has a way to compensate for battery temperature.
Unless you have a separate device for monitoring system parameters, you should opt for a charge controller with a digital meter. Most importantly, you’ll want to monitor battery voltage. The ability to monitor PV panel voltage and current is also helpful. Reduced output may alert you to the need to clean the panels, for instance.
The best available charge controllers (suitable for large systems), are able to convert voltage to lower or higher levels. Your PV array, for example, could be wired to provide 48 volts to the charge controller, which is converted to 24 volts in order to match the voltage requirements of the inverter. Operating at voltages greater than 12-volts can cut system losses due to the resistance of the wiring. By increasing voltage you can use thinner, less expensive wire, and cut costs.
Choose a charge controller that best matches the size of your system. For small systems, the charge controller should consume very little current for its operation. Typically, these are PWM (Pulse Width Modulation) controllers. PWM types provide pulses, instead of a steady DC voltage, to the batteries. For large systems the charge controller should have the ability to track PV panel output and adjust to provide the most efficient charging. This is called MPPT, or Maximum Power Point Tracking.
Step 6. Mounting the Solar Panels.
Keep in mind that cool panels operate much more efficiently than hot panels. Mount the panels in a way that allows good air circulation under them. Check my blog of 2/15/2007 for mounting ideas, and information you’ll need to determine the ideal panel orientation for your geographical location. If panels are to be mounted on a pole or roof, a lightning protection device is a good idea. Install that in accordance with the manufacturer’s instructions.
Step 7. Wiring and Safety Considerations.
Be sure to use wire that is large enough to handle the maximum current that will flow through it. Typically, a set of wires from each solar panel terminates in a combiner box or breaker box, and a thicker wire connects the solar panel array to the charge controller. Since the output of each solar panel is usually less than 10 amps, 10 gauge wires can be used from each panel to the combiner box. Battery interconnections and battery-to-inverter wires will need to be much thicker, since the current flow there can be very high. Fuses, breakers, and disconnect switches should be included in your design for safety.
Check with an electrician for the correct type and size of wiring if you’re not sure, and to make sure everything gets done according to code.
The drawing below is a typical wiring scheme for a small off-grid system. Be sure to include safety devices (not shown here):

Adding Functionality
Perhaps you’ve decided to build a system to lower your electric bills, or to serve as an emergency supply of electricity. The system described here will certainly do those things, but it also has its limitations. You may want your system to kick-in automatically in the event of a power failure, perhaps to prevent frozen food from spoiling when you’re not home. The addition of an “Automatic Transfer Switch” will provide that functionality.
You might want to automatically disconnect batteries from the load, perhaps switching to another source of power, when batteries reach a predetermined state of discharge. Check out my blog entry of 2/25/2008 for more information on that topic.
Be sure to consult with a licensed electrician before connecting to your house wiring.
Conclusion
Don’t let a lack of technical training or experience discourage you from building your own PV system. It’s not that complicated. You can build a safe, efficient system with off-the-shelf equipment from numerous sources. Learn as much as you can before you begin, to avoid altering your plans after you’ve purchased equipment. Be especially careful to take good care of your batteries, as they can be easily damaged by abuse. If you plan to start small and add to your system over time, develop a plan that will allow you to do that with as little waste as possible. Since this post has been primarily an overview, check other websites for in-depth information as needed.
Don’t let the cost of system components discourage you from building your own PV system. Start small if you must, but start. The world is changing, and we cannot continue to burn fossil fuels as we currently do. Future generations deserve more from us, and it seems that we cannot rely on politicians to do the right thing. In the words of Charles Darwin:
“It is not the strongest of the species that survives, not the most intelligent, but the one most responsive to change.”
John
Overview
There are two basic types of solar PV systems, off-grid and grid-tied. An off-grid system uses batteries, while batteries are optional in a grid-tied system. In this article we’ll be discussing off-grid systems. An off-grid system uses solar photovoltaic (PV) panels to turn sunlight into electricity, and stores that electricity in batteries for later use. Battery charging must be done in a controlled manner to protect them from damage, and for efficiency and safety. The stored energy must be converted to AC voltage in order to power ordinary household appliances.
Building a system large enough to meet your daily needs for electricity can be an expensive project. For most people, reducing the load by improving energy efficiency will be more cost effective than building a system big enough to handle a heavy load. Replacing incandescent lights with compact fluorescent (CFL’s), and upgrading to energy-efficient appliances are a couple of things you can do that will pay off in the long run. Having done that, you’re ready to start the design phase.
Step 1. Determine your daily needs.
List the electrical requirements of each device that you plan to power with the PV system. Example:
A 13-watt bulb in use for 5 hours each day (average) uses 13 watts times 5 hours, or 65 watt/hours per day.
Enter the information for each device into a chart as shown below:

Your total energy needs are the sum of the individual requirements of all devices, or 4985 watt/hours per day in this example. You may choose to build a system to meet all of your needs, or choose instead to build a system to meet a portion of your needs.
Tip: If you don’t know the electrical requirements of a particular appliance or device, an inexpensive Kill-A-Watt meter can help you find out. Click (HERE) for more information.
Step 2. Determine the amount of PV needed.
PV panels are rated in watts. One 100-watt panel produces the same amount of power as two 50-watt panels. If you get 4 hours of sunlight each day, a 100-watt panel is capable of producing 4 times 100, or 400-watt/hours of power daily. The example above lists your needs at almost 5000 watt/hours per day. Dividing 5000 by 400 shows that you’ll need twelve and a half 100-watt panels to meet your daily needs. To make up for system losses, and because you’ll probably want all panels to be the same size, you should go at least 20% bigger, opting for 15 panels. You might want even more panels to compensate for extended periods of cloud cover.
Step 3. Planning your battery bank.
Batteries are rated in amp/hours. Begin by converting watt/hours to amp/hours by dividing watt/hours by 12 (the battery voltage). In this example, the 4985 watt/hours that you need divided by 12 equals about 415 amp/hours. Since discharging batteries beyond 50% of their capacity will shorten their life, you’ll need a battery bank rated at no less than 830 amp/hours (in this example). Additionally, you’ll have to increase the size of your battery bank by about 20% to compensate for conversion losses. Having done that, you should have enough battery capacity to get you by for one full day. Ten 100 amp/hour batteries connected in parallel will do the job in this example, but if you want to compensate for extended periods of cloud cover you’ll need more. In addition to keeping your equipment running in the event of extended cloud cover, over-sizing the battery bank helps to extend the life of the batteries as a result of less-aggressive use.
As you shop for batteries, be sure to select those designed for deep cycle applications, not automotive batteries. Batteries designed for golf-carts, floor scrubbers, and forklifts are all good choices. The most expensive batteries tend to have the longest lifespan. Your bank of batteries will be wired to provide 12, 24, or 48 volts. More about that later.
Step 4. Select an inverter.
An inverter converts the low DC voltage from your battery bank to 120-volts AC. To determine the size of the inverter needed, add up the power requirements of all of the loads that you intend to run simultaneously. The total load in Step 1 was just under 5000-watts, but it’s unlikely that you’ll ever use all of those devices at the same time. You might, however, use the microwave oven and toaster at the same time, a total of 1900 watts. You might also have a few lights on at the same time. In this example, an inverter rated at 2000-watts would just meet your needs.
There are two basic types of inverters, modified sine wave and true sine wave. Modified sine wave inverters are much less expensive, but some equipment may not work well with modified sine waves. Motors may overheat and run at the wrong speed, and sensitive electronic equipment can be damaged. For best results, I highly recommend a true sine wave inverter.
The choice of an inverter will also influence another important design decision. Inverters typically accept an input voltage of 12, 24, or 48 volts. Generally speaking, a 12-volt inverter would be the best choice for a small system, while a 24 or 48 volt inverter would be better for a large system.
Step 5. Select a Charge Controller.
A charge controller efficiently controls the battery charging voltage and current, and keeps the batteries from overcharging. If you choose to build a small system, you need not get an expensive charge controller. A single PV panel can produce no more than 5 to 10 amps of current, and just about any charge controller will be able to handle that. A large PV system may require you to use more than one charge controller, splitting the PV panels into two or more sections. Your charge controller should include a battery temperature probe. The charge controller cannot efficiently charge batteries unless it has a way to compensate for battery temperature.
Unless you have a separate device for monitoring system parameters, you should opt for a charge controller with a digital meter. Most importantly, you’ll want to monitor battery voltage. The ability to monitor PV panel voltage and current is also helpful. Reduced output may alert you to the need to clean the panels, for instance.
The best available charge controllers (suitable for large systems), are able to convert voltage to lower or higher levels. Your PV array, for example, could be wired to provide 48 volts to the charge controller, which is converted to 24 volts in order to match the voltage requirements of the inverter. Operating at voltages greater than 12-volts can cut system losses due to the resistance of the wiring. By increasing voltage you can use thinner, less expensive wire, and cut costs.
Choose a charge controller that best matches the size of your system. For small systems, the charge controller should consume very little current for its operation. Typically, these are PWM (Pulse Width Modulation) controllers. PWM types provide pulses, instead of a steady DC voltage, to the batteries. For large systems the charge controller should have the ability to track PV panel output and adjust to provide the most efficient charging. This is called MPPT, or Maximum Power Point Tracking.
Step 6. Mounting the Solar Panels.
Keep in mind that cool panels operate much more efficiently than hot panels. Mount the panels in a way that allows good air circulation under them. Check my blog of 2/15/2007 for mounting ideas, and information you’ll need to determine the ideal panel orientation for your geographical location. If panels are to be mounted on a pole or roof, a lightning protection device is a good idea. Install that in accordance with the manufacturer’s instructions.
Step 7. Wiring and Safety Considerations.
Be sure to use wire that is large enough to handle the maximum current that will flow through it. Typically, a set of wires from each solar panel terminates in a combiner box or breaker box, and a thicker wire connects the solar panel array to the charge controller. Since the output of each solar panel is usually less than 10 amps, 10 gauge wires can be used from each panel to the combiner box. Battery interconnections and battery-to-inverter wires will need to be much thicker, since the current flow there can be very high. Fuses, breakers, and disconnect switches should be included in your design for safety.
Check with an electrician for the correct type and size of wiring if you’re not sure, and to make sure everything gets done according to code.
The drawing below is a typical wiring scheme for a small off-grid system. Be sure to include safety devices (not shown here):

Adding Functionality
Perhaps you’ve decided to build a system to lower your electric bills, or to serve as an emergency supply of electricity. The system described here will certainly do those things, but it also has its limitations. You may want your system to kick-in automatically in the event of a power failure, perhaps to prevent frozen food from spoiling when you’re not home. The addition of an “Automatic Transfer Switch” will provide that functionality.
You might want to automatically disconnect batteries from the load, perhaps switching to another source of power, when batteries reach a predetermined state of discharge. Check out my blog entry of 2/25/2008 for more information on that topic.
Be sure to consult with a licensed electrician before connecting to your house wiring.
Conclusion
Don’t let a lack of technical training or experience discourage you from building your own PV system. It’s not that complicated. You can build a safe, efficient system with off-the-shelf equipment from numerous sources. Learn as much as you can before you begin, to avoid altering your plans after you’ve purchased equipment. Be especially careful to take good care of your batteries, as they can be easily damaged by abuse. If you plan to start small and add to your system over time, develop a plan that will allow you to do that with as little waste as possible. Since this post has been primarily an overview, check other websites for in-depth information as needed.
Don’t let the cost of system components discourage you from building your own PV system. Start small if you must, but start. The world is changing, and we cannot continue to burn fossil fuels as we currently do. Future generations deserve more from us, and it seems that we cannot rely on politicians to do the right thing. In the words of Charles Darwin:
“It is not the strongest of the species that survives, not the most intelligent, but the one most responsive to change.”
John
Friday, August 15, 2008
Sizing Your Off-Grid Solar Electric System
The average US home consumes about 940kwh of electricity each month. For many, electricity use could be cut in half with a serious conservation effort. But if you had to rely on a small photovoltaic (PV) system could you get by on 120kwh per month?
To get by on less you’ll first need to make sure you’re using electricity as efficiently as possible. Replacing incandescent light bulbs with compact fluorescent (CFL’s) is a good start. You’ll also benefit by eliminating phantom loads and replacing inefficient appliances. I’ve listed many more things you can do in previous posts, so I won’t repeat them here. Check this blog’s archives for that information.
Living (comfortably) off-grid on less than 120kwh of electricity per month (about 4kwh per day) may sound impossible, but you just might be able to do it. Here’s how:
Of the 20 or so 13 watt CFL lights in your home, you might use each (on the average) 1 hour per day. So, 13 times 20 times 1 = 260 watt/hours. Shown below is the total for lights, and a list of other ways you might use this limited supply of electricity.
Lights: 13 watts X 20 hours = 260 watt/hours
Refrigerator: 50 watts (average) X 24 hours = 1200 watt/hours
TV and Cable box: 125 watts X 3 hours = 375 watt/hours
Radio: 5 watts X 6 hours = 30 watt/hours
Fans: 35 watts X 16 hours = 560 watt/hours
Computer and monitor: 120 watts X 2 hours = 240 watt/hours
Microwave oven: 1000 watts X 0.5 hours = 500 watt/hours
Toaster: 900 watts X 0.1 hours = 90 watt/hours
Vacuum Cleaner: 750 watts X .2 hours = 150 watt/hours
Cell Phone Battery Charger: 25 watts X 2 hours = 50 watt/hours
Washing Machine: 500 watts X .25 hours = 125 watt/hours
Iron: 1000 watts X .25 hours = 250 watt/hours
Total: 3930 watt/hours per day
How you use the available electricity will not exactly match my list of course. This is simply an example to show how you might get by on much less electricity than you’re currently using. Off-grid doesn’t have to mean living like a caveman. A small PV system can meet most of your electrical needs, including a limited amount of cooking and climate control. As long as you have other systems in place for heating, cooling, and other high-energy devices, you could live quite comfortably on much less than you currently use.
Why is this important?
Most of us purchase electricity from our local utility company for less than 2% of our household income. Because grid-supplied electricity is inexpensive and convenient, few people have any interest in alternatives at this time. But just as gasoline prices have skyrocketed in the last two years, we’ll soon see the cost of electricity increase dramatically. Most consumers will deal with this by cutting back, but some will choose to disconnect from the grid. A PV system large enough to meet your current electricity requirements may cost 25 to 35 thousand dollars. For most, reducing usage and installing a smaller PV system will be easier and less costly than installing a system big enough to meet current demands for electricity.
What would this smaller PV system cost?
First of all it’s important to understand that a system capable of providing 4kwh of electricity a day will not provide 4kwh on a cloudy/rainy day. Typically, a lack of sunshine prompts the user to either cut back on electricity use that day, or to use another source of electricity during those times, typically a generator. It is also important to understand that we’re discussing an off-grid system, not a grid-tied system. An off-grid system includes the extra expense of batteries, and is not as efficient as a grid-tied system. Your system design might include a battery bank large enough to compensate for a day or two of cloudy conditions.
PV panels produce electricity when the sun strikes them, but are most productive during hours of peak-sunlight, or stated another way, when the sun is almost directly overhead. We’ll do our calculations based on an average of 4 hours of sunlight each day. A 100 watt solar panel can produce 400 watts/hours (100 watts times 4 hours) of power each day. It follows then that to get 4000 watt/hours (4kwh)from the panels each day, you’ll need 1000 watts of PV panels. To make up for system inefficiencies, you should shoot for at least 1200 watts of PV. That would be 12 one hundred watt panels for example. If you shop around, you’ll find solar panels for less than $4.50 per watt, so you’ll spend about $5400.00 for PV panels alone. You’ll also need a charge controller, batteries, an inverter, panel mounting hardware, wire, and safety components. These items can be bought for $2600.00 if you shop around. If you’re not able to do the installation yourself, you might spend another $3000.00 for that, making your total cost about $11,000.00. If this sounds expensive, don’t forget that it eliminates your electric bill. The system could pay for itself in 5 years, or less as electricity prices increase. And since solar panels can be expected to last in excess of 20 years, you’ll be getting many years of low-cost electricity after that.
Using your system:
Your small system may not always keep up with your needs, but you’ll learn techniques to maximize efficiency. Using energy from the sun as it’s generated (instead of storing it in batteries for later use), increases system efficiency greatly. By using the vacuum cleaner, washing machine, and other appliances during peak-sunlight hours you eliminate losses associated with converting, storing, and retrieving energy. Your goal should be to use electricity wisely, ensuring a surplus. That surplus will come in handy when it’s cloudy.
Conclusion:
Having your own power plant means that you’ll not be affected by outages and brown-outs that grid-connected customers often experience. News reports about rate increases will no longer concern you. You’ll feel good knowing that by disconnecting from the grid you’re not contributing to the environmental problems associated with mining and burning coal to produce electricity. By installing your own PV system you’ll be taking an important step toward personal electric transportation, or as a politician might say eliminating your “addiction to oil”. Declining oil supplies will soon usher in the age of electric cars, and it’s not unreasonable to think that someday you’ll be able to drive on free energy from the sun. That’s something to get excited about!
John
To get by on less you’ll first need to make sure you’re using electricity as efficiently as possible. Replacing incandescent light bulbs with compact fluorescent (CFL’s) is a good start. You’ll also benefit by eliminating phantom loads and replacing inefficient appliances. I’ve listed many more things you can do in previous posts, so I won’t repeat them here. Check this blog’s archives for that information.
Living (comfortably) off-grid on less than 120kwh of electricity per month (about 4kwh per day) may sound impossible, but you just might be able to do it. Here’s how:
Of the 20 or so 13 watt CFL lights in your home, you might use each (on the average) 1 hour per day. So, 13 times 20 times 1 = 260 watt/hours. Shown below is the total for lights, and a list of other ways you might use this limited supply of electricity.
Lights: 13 watts X 20 hours = 260 watt/hours
Refrigerator: 50 watts (average) X 24 hours = 1200 watt/hours
TV and Cable box: 125 watts X 3 hours = 375 watt/hours
Radio: 5 watts X 6 hours = 30 watt/hours
Fans: 35 watts X 16 hours = 560 watt/hours
Computer and monitor: 120 watts X 2 hours = 240 watt/hours
Microwave oven: 1000 watts X 0.5 hours = 500 watt/hours
Toaster: 900 watts X 0.1 hours = 90 watt/hours
Vacuum Cleaner: 750 watts X .2 hours = 150 watt/hours
Cell Phone Battery Charger: 25 watts X 2 hours = 50 watt/hours
Washing Machine: 500 watts X .25 hours = 125 watt/hours
Iron: 1000 watts X .25 hours = 250 watt/hours
Total: 3930 watt/hours per day
How you use the available electricity will not exactly match my list of course. This is simply an example to show how you might get by on much less electricity than you’re currently using. Off-grid doesn’t have to mean living like a caveman. A small PV system can meet most of your electrical needs, including a limited amount of cooking and climate control. As long as you have other systems in place for heating, cooling, and other high-energy devices, you could live quite comfortably on much less than you currently use.
Why is this important?
Most of us purchase electricity from our local utility company for less than 2% of our household income. Because grid-supplied electricity is inexpensive and convenient, few people have any interest in alternatives at this time. But just as gasoline prices have skyrocketed in the last two years, we’ll soon see the cost of electricity increase dramatically. Most consumers will deal with this by cutting back, but some will choose to disconnect from the grid. A PV system large enough to meet your current electricity requirements may cost 25 to 35 thousand dollars. For most, reducing usage and installing a smaller PV system will be easier and less costly than installing a system big enough to meet current demands for electricity.
What would this smaller PV system cost?
First of all it’s important to understand that a system capable of providing 4kwh of electricity a day will not provide 4kwh on a cloudy/rainy day. Typically, a lack of sunshine prompts the user to either cut back on electricity use that day, or to use another source of electricity during those times, typically a generator. It is also important to understand that we’re discussing an off-grid system, not a grid-tied system. An off-grid system includes the extra expense of batteries, and is not as efficient as a grid-tied system. Your system design might include a battery bank large enough to compensate for a day or two of cloudy conditions.
PV panels produce electricity when the sun strikes them, but are most productive during hours of peak-sunlight, or stated another way, when the sun is almost directly overhead. We’ll do our calculations based on an average of 4 hours of sunlight each day. A 100 watt solar panel can produce 400 watts/hours (100 watts times 4 hours) of power each day. It follows then that to get 4000 watt/hours (4kwh)from the panels each day, you’ll need 1000 watts of PV panels. To make up for system inefficiencies, you should shoot for at least 1200 watts of PV. That would be 12 one hundred watt panels for example. If you shop around, you’ll find solar panels for less than $4.50 per watt, so you’ll spend about $5400.00 for PV panels alone. You’ll also need a charge controller, batteries, an inverter, panel mounting hardware, wire, and safety components. These items can be bought for $2600.00 if you shop around. If you’re not able to do the installation yourself, you might spend another $3000.00 for that, making your total cost about $11,000.00. If this sounds expensive, don’t forget that it eliminates your electric bill. The system could pay for itself in 5 years, or less as electricity prices increase. And since solar panels can be expected to last in excess of 20 years, you’ll be getting many years of low-cost electricity after that.
Using your system:
Your small system may not always keep up with your needs, but you’ll learn techniques to maximize efficiency. Using energy from the sun as it’s generated (instead of storing it in batteries for later use), increases system efficiency greatly. By using the vacuum cleaner, washing machine, and other appliances during peak-sunlight hours you eliminate losses associated with converting, storing, and retrieving energy. Your goal should be to use electricity wisely, ensuring a surplus. That surplus will come in handy when it’s cloudy.
Conclusion:
Having your own power plant means that you’ll not be affected by outages and brown-outs that grid-connected customers often experience. News reports about rate increases will no longer concern you. You’ll feel good knowing that by disconnecting from the grid you’re not contributing to the environmental problems associated with mining and burning coal to produce electricity. By installing your own PV system you’ll be taking an important step toward personal electric transportation, or as a politician might say eliminating your “addiction to oil”. Declining oil supplies will soon usher in the age of electric cars, and it’s not unreasonable to think that someday you’ll be able to drive on free energy from the sun. That’s something to get excited about!
John
Monday, June 09, 2008
Adjusting to New Batteries and Higher Electric Rates
Every PV system upgrade has had a noticeable effect on performance, and my recent battery upgrade was no exception. The larger battery bank takes longer to charge on a sunny day, but it also powers loads for longer periods at night. Because of the battery bank upgrade, I decided that it would be wise to review system settings. My goals are:
• Prevent battery overcharging.
• Prevent battery under-charging.
• Prevent batteries from discharging too deeply.
• Get as much energy from the system as possible, reducing my electric bill.
• Maintain safety.
A charge controller prevents batteries from overcharging, and mine is adjustable via internal switches. Since my old batteries were sealed, and my new batteries have removable watering caps, I’ve readjusted charging parameters to accommodate the new batteries. I’ve adjusted the battery voltage upward a little. Some “gassing” shouldn’t be a problem, since I’ll be checking battery fluid level on a regular basis.
My batteries are in a windowed sunroom, and therefore I’ve set “Equalization” to manual instead of using the automatic equalization setting. I’ll open the windows when I equalize the batteries, allowing hydrogen gas to escape. My charge controller keeps track of the days between equalization, so I’ll know when it’s time to do it.
My automation settings help me get the most from my system, while protecting the batteries, by performing two basic functions:
• Wait until batteries are nearly fully charged before switching on loads.
• When battery voltage declines to a preset value, remove the loads.
The automation settings turn the inverter on and off, and therefore control the loads. I’ve adjusted the settings as posted below:
• Battery High Voltage Threshold = 13.85 volts (Turn inverter on)
• Battery Low Voltage Threshold = 12.25 volts (Turn inverter off)
I have a Transfer Switch, which is nothing more than a relay, wired to use AC from the inverter as the default. It switches to utility-supplied AC when the inverter is off. With this setup I can be pretty sure that my refrigerator and freezer will always be powered up.
Since I’ve just spent a great deal of money on the new batteries I’ve decided to be more conservative with the settings in order to prolong their life. I’ve adjusted the Battery Low Voltage Threshold upward, minimizing the depth of discharge. This adjustment not only prolongs the life of the battery, it means that I’ll have more reserve energy available in the event of a grid power failure. I’ve adjusted the Battery High Voltage Threshold upward, providing a little more assurance that the batteries will be fully recharged each day.
Even with these conservative settings I’ve observed a significant performance increase with the new batteries. I’ve also learned that it is beneficial to keep the load relatively high. A heavy load reduces the amount of time that the charge controller spends in the “absorption” and “float” states. In other words; more of the available sun’s energy is used to power the loads and therefore less of the sun’s energy is unused.
Adjusting to “PowerSmart Pricing”
My electricity rates vary on an hourly basis, depending on the demand at the time. I might pay as little as 1.5 cents per kwh when demand is low, and more than 17 cents per kwh when demand is high. Now that summer is here, and demand is greater, electric rates tend to be highest from about 10:00am until about 8:00pm. This has caused me to adjust my strategy somewhat. I want to make sure that I’m using electricity from the PV system as much as possible during times when rates are highest. In addition to using as much energy from the sun as possible I can take advantage of this large price differential by charging my batteries at night when rates are low, and use the stored energy during the day when rates are high.
In other words:
I sometimes buy electricity for less than 2 cents per kwh (to charge batteries), and use that stored energy when utility rates exceed 17 cents per kwh. Even with system losses considered, I suspect that I’ll come out ahead. I shift loads to the PV system when electric rates are highest, hoping to have enough energy from the sun and stored energy to last until rates drop.
To avoid manually switching things on and off in the early morning hours I use a timer. Here's a picture of my timer, charger, and battery bank.

And here's a simplified diagram of my system with the charger and timer:

I’ll have to compare this summer’s electric bill to that of last summer to see if my efforts have paid off. If so, I don’t think I’ll have any problem convincing the wife that we can benefit from a couple more panels by the end of the year.
John
• Prevent battery overcharging.
• Prevent battery under-charging.
• Prevent batteries from discharging too deeply.
• Get as much energy from the system as possible, reducing my electric bill.
• Maintain safety.
A charge controller prevents batteries from overcharging, and mine is adjustable via internal switches. Since my old batteries were sealed, and my new batteries have removable watering caps, I’ve readjusted charging parameters to accommodate the new batteries. I’ve adjusted the battery voltage upward a little. Some “gassing” shouldn’t be a problem, since I’ll be checking battery fluid level on a regular basis.
My batteries are in a windowed sunroom, and therefore I’ve set “Equalization” to manual instead of using the automatic equalization setting. I’ll open the windows when I equalize the batteries, allowing hydrogen gas to escape. My charge controller keeps track of the days between equalization, so I’ll know when it’s time to do it.
My automation settings help me get the most from my system, while protecting the batteries, by performing two basic functions:
• Wait until batteries are nearly fully charged before switching on loads.
• When battery voltage declines to a preset value, remove the loads.
The automation settings turn the inverter on and off, and therefore control the loads. I’ve adjusted the settings as posted below:
• Battery High Voltage Threshold = 13.85 volts (Turn inverter on)
• Battery Low Voltage Threshold = 12.25 volts (Turn inverter off)
I have a Transfer Switch, which is nothing more than a relay, wired to use AC from the inverter as the default. It switches to utility-supplied AC when the inverter is off. With this setup I can be pretty sure that my refrigerator and freezer will always be powered up.
Since I’ve just spent a great deal of money on the new batteries I’ve decided to be more conservative with the settings in order to prolong their life. I’ve adjusted the Battery Low Voltage Threshold upward, minimizing the depth of discharge. This adjustment not only prolongs the life of the battery, it means that I’ll have more reserve energy available in the event of a grid power failure. I’ve adjusted the Battery High Voltage Threshold upward, providing a little more assurance that the batteries will be fully recharged each day.
Even with these conservative settings I’ve observed a significant performance increase with the new batteries. I’ve also learned that it is beneficial to keep the load relatively high. A heavy load reduces the amount of time that the charge controller spends in the “absorption” and “float” states. In other words; more of the available sun’s energy is used to power the loads and therefore less of the sun’s energy is unused.
Adjusting to “PowerSmart Pricing”
My electricity rates vary on an hourly basis, depending on the demand at the time. I might pay as little as 1.5 cents per kwh when demand is low, and more than 17 cents per kwh when demand is high. Now that summer is here, and demand is greater, electric rates tend to be highest from about 10:00am until about 8:00pm. This has caused me to adjust my strategy somewhat. I want to make sure that I’m using electricity from the PV system as much as possible during times when rates are highest. In addition to using as much energy from the sun as possible I can take advantage of this large price differential by charging my batteries at night when rates are low, and use the stored energy during the day when rates are high.
In other words:
I sometimes buy electricity for less than 2 cents per kwh (to charge batteries), and use that stored energy when utility rates exceed 17 cents per kwh. Even with system losses considered, I suspect that I’ll come out ahead. I shift loads to the PV system when electric rates are highest, hoping to have enough energy from the sun and stored energy to last until rates drop.
To avoid manually switching things on and off in the early morning hours I use a timer. Here's a picture of my timer, charger, and battery bank.

And here's a simplified diagram of my system with the charger and timer:

I’ll have to compare this summer’s electric bill to that of last summer to see if my efforts have paid off. If so, I don’t think I’ll have any problem convincing the wife that we can benefit from a couple more panels by the end of the year.
John
Thursday, May 08, 2008
Another Grid Power Failure
And another test of my off-grid solar electric system:
With each grid power failure I learn new things, and Wednesday’s power failure was no exception. This power failure occurred early in the afternoon while I was at work. It was a gloomy day, and batteries were not fully charged at the time of the failure, making it necessary to switch the system on manually. This would have been easy for me to do, had I been home at the time, but not so easy for a family member. The simple system I once had is now an automated system with several components and switches. Explaining over the phone how to switch the system on is not as simple as it was in the past. It went something like this:
Me: Flip the Inverter toggle switch on.
Family Member: Which one is the inverter?
Me: The black box that says Exeltech on it.
Family Member: Where is the on/off switch?
Me: It is under the Kill-A-Watt meter.
Family Member: Which one is the Kill-A-Watt meter?
Me: It’s the grey thing that’s plugged in to the inverter.
Family Member: I don’t see a switch under the Kill-A-Watt meter.
Me: The switch isn’t on the Kill-A-Watt meter, it’s on the front of the Inverter.
Family Member: OK. I’ve switched it on and I see a green light.
Me: That’s what you should see. The system is now on.
From this experience I’ve learned that I need to better educate family members so they’ll be prepared for the next grid power failure. To help with this, I’ve created a visual aid. The name of each device is listed next to its picture, along with a brief description. Basic operating instructions are also provided. The challenge is to provide enough information, but not too much. Too much information could be confusing.
First of all, family members need to understand the system configuration. There are two common system configurations:
Configuration #1: In the event of a grid-power failure, the inverter switches on, and the loads are automatically switched from grid power to battery power.
Configuration #2: Loads are powered by battery power until battery voltage drops to a preset level. Loads are then automatically switched to grid power.
My system is wired for Configuration #2. The system doesn’t automatically switch on when a power failure occurs; it switches on when batteries are fully charged. The refrigerator, freezer, and anything else plugged into the system’s AC outlet will automatically switch to grid power when the inverter switches off, but a grid power failure does not automatically switch the loads to battery power.
Because it is sometimes necessary to switch the system on manually, it must also be switched off manually, and users also need to know when to do that. Users need to monitor battery voltage, and must avoid letting battery voltage drop too far. This can be a little tricky too, since battery voltage is influenced by the size of the load. And so, without supplying too much information, I need to set a low-battery-voltage limit for them to follow.
To complicate things just a little, I’ve also provided information about the back-up battery bank, and how to switch it into the circuit. As with the main battery bank, battery voltage must be monitored and voltage must not be allowed to fall below a predetermined low-voltage limit.
Wednesday’s grid power failure was brief, about 2 hours, but it was a valuable learning experience. With the visual aid I’ve created, and a little instruction, we’re better prepared for the next power failure. We’ve been having a lot of storms lately, so we may not have to wait long to find out.
John
With each grid power failure I learn new things, and Wednesday’s power failure was no exception. This power failure occurred early in the afternoon while I was at work. It was a gloomy day, and batteries were not fully charged at the time of the failure, making it necessary to switch the system on manually. This would have been easy for me to do, had I been home at the time, but not so easy for a family member. The simple system I once had is now an automated system with several components and switches. Explaining over the phone how to switch the system on is not as simple as it was in the past. It went something like this:
Me: Flip the Inverter toggle switch on.
Family Member: Which one is the inverter?
Me: The black box that says Exeltech on it.
Family Member: Where is the on/off switch?
Me: It is under the Kill-A-Watt meter.
Family Member: Which one is the Kill-A-Watt meter?
Me: It’s the grey thing that’s plugged in to the inverter.
Family Member: I don’t see a switch under the Kill-A-Watt meter.
Me: The switch isn’t on the Kill-A-Watt meter, it’s on the front of the Inverter.
Family Member: OK. I’ve switched it on and I see a green light.
Me: That’s what you should see. The system is now on.
From this experience I’ve learned that I need to better educate family members so they’ll be prepared for the next grid power failure. To help with this, I’ve created a visual aid. The name of each device is listed next to its picture, along with a brief description. Basic operating instructions are also provided. The challenge is to provide enough information, but not too much. Too much information could be confusing.
First of all, family members need to understand the system configuration. There are two common system configurations:
Configuration #1: In the event of a grid-power failure, the inverter switches on, and the loads are automatically switched from grid power to battery power.
Configuration #2: Loads are powered by battery power until battery voltage drops to a preset level. Loads are then automatically switched to grid power.
My system is wired for Configuration #2. The system doesn’t automatically switch on when a power failure occurs; it switches on when batteries are fully charged. The refrigerator, freezer, and anything else plugged into the system’s AC outlet will automatically switch to grid power when the inverter switches off, but a grid power failure does not automatically switch the loads to battery power.
Because it is sometimes necessary to switch the system on manually, it must also be switched off manually, and users also need to know when to do that. Users need to monitor battery voltage, and must avoid letting battery voltage drop too far. This can be a little tricky too, since battery voltage is influenced by the size of the load. And so, without supplying too much information, I need to set a low-battery-voltage limit for them to follow.
To complicate things just a little, I’ve also provided information about the back-up battery bank, and how to switch it into the circuit. As with the main battery bank, battery voltage must be monitored and voltage must not be allowed to fall below a predetermined low-voltage limit.
Wednesday’s grid power failure was brief, about 2 hours, but it was a valuable learning experience. With the visual aid I’ve created, and a little instruction, we’re better prepared for the next power failure. We’ve been having a lot of storms lately, so we may not have to wait long to find out.
John
Saturday, May 03, 2008
My Latest Off-Grid PV System Upgrade
Because of a recent system upgrade I now have better control over the amount of power I use, and the amount of power I keep in reserve. While I want to benefit from as much power as the system is capable of providing on a day-to-day basis, I find myself cutting back, knowing that I’ll need stored energy in the event of a grid power failure. I need to strike a balance between the amount of power I use, and the amount of power I keep in reserve, but I find myself wanting more of both.
Since my solar panels have the ability to fully charge the existing battery bank by noon on a sunny day, it’s obvious that I have the capacity to charge a larger battery bank. It seems that a battery bank upgrade will allow me to get more from the system on a daily basis while at the same time increasing the amount of stored energy. For that reason, I’ve just replaced my old battery bank, increasing the amp-hour capacity from 420 to 675.
I’ve known that I could greatly improve system performance with a bigger battery bank for some time, but I’ve been holding off because my old batteries are still in good shape. Since batteries of different sizes, types, and ages shouldn’t be included in the same battery bank, I was confronted with the problem of what to do with the old batteries. I decided to isolate the two battery banks from each other, and to use a switch to connect or disconnect the old battery bank as needed. The diagram below shows how I did that:
Since my solar panels have the ability to fully charge the existing battery bank by noon on a sunny day, it’s obvious that I have the capacity to charge a larger battery bank. It seems that a battery bank upgrade will allow me to get more from the system on a daily basis while at the same time increasing the amount of stored energy. For that reason, I’ve just replaced my old battery bank, increasing the amp-hour capacity from 420 to 675.
I’ve known that I could greatly improve system performance with a bigger battery bank for some time, but I’ve been holding off because my old batteries are still in good shape. Since batteries of different sizes, types, and ages shouldn’t be included in the same battery bank, I was confronted with the problem of what to do with the old batteries. I decided to isolate the two battery banks from each other, and to use a switch to connect or disconnect the old battery bank as needed. The diagram below shows how I did that:

The new ones are 6-volt batteries, most commonly used in golf carts. I series wired three pairs of these to create the equivalent of three 12-volt batteries at 225ah each, and paralleled the three pairs for 675ah at 12-volts. I’ve installed a heavy-duty switch, allowing me to switch in bank 1, bank 2, or both banks at the same time. I’ll switch in the new battery bank for day-to-day operation, only switching to the old bank once in awhile to keep it fully charged. In the event of a power failure, when I’ll need the extra capacity, I’ll switch in both battery banks. With both battery banks connected, I’ll have one large battery bank with an awesome 1095 amp-hour capacity.
Understanding that batteries should not be allowed to fall to more than 50% of their capacity, I now have a useable capacity of 547 amp-hours, a significant upgrade from the previous 210 amp-hour useable capacity I previously had. After monitoring the new battery bank for a few days I observed that:
· It does indeed take more time to fully charge the bank.
· Loads are powered for a longer period of time each evening, after the sun goes down.
In the event of an extended power failure I’ll have light, refrigeration, communications, the ability to prepare food. I’ll be able to use my bio-fueled stove for heat, and fans to circulate fresh air. I’ll be able to watch TV or listen to the radio. I’ve had these capabilities previously, but not to the extent that I have them now. This will serve me well in the event of an extended power failure. I’ll need to continue upgrading the system if I expect to use it to charge the electric vehicle I hope to purchase within the next two years, but I’m getting there. I’ll be doing some capacity tests soon, and I’ll record the results on this blog. Check back later.
For information concerning my recent system automation upgrade, check my February 25th post: http://solarjohn.blogspot.com/2008/02/ive-automated-my-off-grid-pv-system.html
John
Saturday, March 29, 2008
Small-Scale Solar PV for Your Home
Not ready to spend thousands on a solar electric system to power your home? Consider powering a portion of your home with solar instead.
A few years ago this probably wouldn’t have been a good idea, since small home-based PV systems tend to be underused. After all, if you try to run your refrigerator with a small system you might return home from work some cloudy day and find a lot of spoiled food. Since most of us work or go to school during the day, power from a small system is typically used to charge batteries. That stored energy might be used for a few hours of TV viewing or to run a computer in the evening. But energy from the sun during peak sunlight hours could be more efficiently used to power a load. Better yet, mid-day power from the solar panels could power a load and charge batteries simultaneously.
You can easily build a system that will use power from the panels and batteries to run the load until battery voltage drops to a preset level. The load will then be automatically switched to AC from the power grid. A few years ago it would have taken a computer guru, or an electronics engineer to make that happen, but not today. Today the components you'll need are available at a reasonable cost, and it doesn’t take a scientist to hook things up.
By adding automation to a simple off-grid PV system you’ll be using as much of the free energy from the sun as your system is capable of processing, making the most of your renewable energy investment. You’ll be cutting your electric bill as much as possible, instead of under-using your solar panels and equipment. You can use a refrigerator and freezer as the load without worrying about food spoiling, and your batteries will be protected from over charging and from over discharging, extending their life.
The system is expandable. You can start on a small budget, and add to your system as funds become available. Once you see how well this works, and how little maintenance is required, you’ll want to make it bigger.
Does this idea appeal to you? Check out my blog archives for system design details, especially this one:
"I've automated my off-grid pv system"
You need not use the same system parts or configuration. My approach represents one of many ways to do it. You might discover other ways as you look at the capabilities of different brands and types of system components.
I’ll be happy to answer your questions. Just leave a comment.
John
A few years ago this probably wouldn’t have been a good idea, since small home-based PV systems tend to be underused. After all, if you try to run your refrigerator with a small system you might return home from work some cloudy day and find a lot of spoiled food. Since most of us work or go to school during the day, power from a small system is typically used to charge batteries. That stored energy might be used for a few hours of TV viewing or to run a computer in the evening. But energy from the sun during peak sunlight hours could be more efficiently used to power a load. Better yet, mid-day power from the solar panels could power a load and charge batteries simultaneously.
You can easily build a system that will use power from the panels and batteries to run the load until battery voltage drops to a preset level. The load will then be automatically switched to AC from the power grid. A few years ago it would have taken a computer guru, or an electronics engineer to make that happen, but not today. Today the components you'll need are available at a reasonable cost, and it doesn’t take a scientist to hook things up.
By adding automation to a simple off-grid PV system you’ll be using as much of the free energy from the sun as your system is capable of processing, making the most of your renewable energy investment. You’ll be cutting your electric bill as much as possible, instead of under-using your solar panels and equipment. You can use a refrigerator and freezer as the load without worrying about food spoiling, and your batteries will be protected from over charging and from over discharging, extending their life.
The system is expandable. You can start on a small budget, and add to your system as funds become available. Once you see how well this works, and how little maintenance is required, you’ll want to make it bigger.
Does this idea appeal to you? Check out my blog archives for system design details, especially this one:
"I've automated my off-grid pv system"
You need not use the same system parts or configuration. My approach represents one of many ways to do it. You might discover other ways as you look at the capabilities of different brands and types of system components.
I’ll be happy to answer your questions. Just leave a comment.
John
Saturday, March 15, 2008
Carpe diem
Carpe diem, or “seize the moment”, is a good way to describe my latest effort to get the most from my off-grid solar electric system. Because electric rates are lowest during the early morning hours, I’ve implemented a plan to shift my electricity usage to that period of time. And no, my plan doesn’t involve staying up all night to do laundry or to cook meals.
My Variable Electric Rates
Although my actual rate varies from day to day, the chart below is typical of my rates for any given day. Notice that I pay about 2 ½ cents per kwh for electricity during the first five hours of the day, and much more than that at any other time of the day.

Building on the system I already have, I’ve added a sophisticated battery charger and a timer. The premise is simple: Charge batteries at night, when rates are low, and use the stored energy in the early morning hours when electric rates are higher. Shortly after that, the loads are powered by the sun. The diagram below is of my system, including the timer and battery charger.

Here is a picture of the charger and timer. Actually, I had to replace the timer. This one wasn’t “heavy-duty” enough.

Theory of Operation
The AC loads are powered by the batteries when battery SOC (state of charge) is high, and by the utility grid when battery SOC is low. That part of the system automation was explained in a previous article, and so I’ll not repeat it here.
The timer is set to apply AC to the battery charger between the hours of 1:00am and 5:00am every day. The battery charger is a three-stage charger, meaning that it will not overcharge. It switches to “float” mode when it senses full batteries, and it does not represent a discharge path when it is switched off.
Due to the evening loads, battery voltage is low just before 1:00am. When the timer applies AC to the battery charger, battery voltage rises rapidly. Once the batteries reach a predetermined SOC, the loads are switched from grid-supplied AC to AC from the system. At that point the charger continues to charge the batteries, and it also provides the power necessary to run the AC loads. At 5:00am the timer disconnects AC from the charger, and the loads are powered with the energy stored in the batteries. Soon after that, the sun comes up. On a sunny day, the solar panels keep the batteries charged and provide power to the loads. When the sun sets, the loads are once again powered by the energy stored in the batteries, and battery voltage declines. When battery SOC drops to a preset level, the loads are transferred to grid-supplied power. This cycle repeats every day.
Initial Test
The data logger was set to take battery voltage readings every 30 minutes. The sharp voltage increases (look just to the right of the vertical grid lines) show that AC voltage was applied to the charger. The vertical grid lines indicate midnight. Battery voltage stabilizes somewhat, and then sharply falls off when AC to the charter is removed. The batteries continue to power the load for awhile after that, resulting in a gradual decline of battery voltage. Then, the sun shines on the panels and battery voltage increases once again.
Except for the first day of the test, batteries were not fully charged. This is disturbing, since chronically undercharging batteries can shorten their life. For the duration of this test the load consisted of a refrigerator, a freezer, a TV, and a cable box. To correct the problem, I’ve reduced the load by removing the TV and cable box.
I initially set the timer to apply power to the charger for three hours each night. I determined that this was not enough, and increased the charger on-time to four hours.
The jagged lines on the graph are the result of devices switching on and off.

Conclusion
It looks as though I’ve managed to cut my use of utility-provided electricity just before the sun comes up, accomplishing my goal. But wildly fluctuating electric rates, and the inefficiencies of storing and retrieving utility-provided electricity, make it difficult to estimate any savings I might realize as a result of this plan. This has been an interesting experiment, but I don’t think I’ll continue it. I’ll be better off with a bigger battery bank, eliminating the need to use this timer/charger arrangement. Still, I can think of two benefits of this plan:
1. Batteries will tend to be kept at a higher SOC, extending their life.
2. This process is similar to the experience of those who actually live off-grid. Those who live off-grid usually have a secondary source of electricity, a generator perhaps. When lack of sunshine necessitates the use of the generator, using it for brief periods to charge batteries is the best strategy. In my case, I’ve substituted grid-supplied power for generator-derived power. Living off-grid is my ultimate goal, and this experience helps me learn more about that.
John
My Variable Electric Rates
Although my actual rate varies from day to day, the chart below is typical of my rates for any given day. Notice that I pay about 2 ½ cents per kwh for electricity during the first five hours of the day, and much more than that at any other time of the day.

Building on the system I already have, I’ve added a sophisticated battery charger and a timer. The premise is simple: Charge batteries at night, when rates are low, and use the stored energy in the early morning hours when electric rates are higher. Shortly after that, the loads are powered by the sun. The diagram below is of my system, including the timer and battery charger.

Here is a picture of the charger and timer. Actually, I had to replace the timer. This one wasn’t “heavy-duty” enough.

Theory of Operation
The AC loads are powered by the batteries when battery SOC (state of charge) is high, and by the utility grid when battery SOC is low. That part of the system automation was explained in a previous article, and so I’ll not repeat it here.
The timer is set to apply AC to the battery charger between the hours of 1:00am and 5:00am every day. The battery charger is a three-stage charger, meaning that it will not overcharge. It switches to “float” mode when it senses full batteries, and it does not represent a discharge path when it is switched off.
Due to the evening loads, battery voltage is low just before 1:00am. When the timer applies AC to the battery charger, battery voltage rises rapidly. Once the batteries reach a predetermined SOC, the loads are switched from grid-supplied AC to AC from the system. At that point the charger continues to charge the batteries, and it also provides the power necessary to run the AC loads. At 5:00am the timer disconnects AC from the charger, and the loads are powered with the energy stored in the batteries. Soon after that, the sun comes up. On a sunny day, the solar panels keep the batteries charged and provide power to the loads. When the sun sets, the loads are once again powered by the energy stored in the batteries, and battery voltage declines. When battery SOC drops to a preset level, the loads are transferred to grid-supplied power. This cycle repeats every day.
Initial Test
The data logger was set to take battery voltage readings every 30 minutes. The sharp voltage increases (look just to the right of the vertical grid lines) show that AC voltage was applied to the charger. The vertical grid lines indicate midnight. Battery voltage stabilizes somewhat, and then sharply falls off when AC to the charter is removed. The batteries continue to power the load for awhile after that, resulting in a gradual decline of battery voltage. Then, the sun shines on the panels and battery voltage increases once again.
Except for the first day of the test, batteries were not fully charged. This is disturbing, since chronically undercharging batteries can shorten their life. For the duration of this test the load consisted of a refrigerator, a freezer, a TV, and a cable box. To correct the problem, I’ve reduced the load by removing the TV and cable box.
I initially set the timer to apply power to the charger for three hours each night. I determined that this was not enough, and increased the charger on-time to four hours.
The jagged lines on the graph are the result of devices switching on and off.

Conclusion
It looks as though I’ve managed to cut my use of utility-provided electricity just before the sun comes up, accomplishing my goal. But wildly fluctuating electric rates, and the inefficiencies of storing and retrieving utility-provided electricity, make it difficult to estimate any savings I might realize as a result of this plan. This has been an interesting experiment, but I don’t think I’ll continue it. I’ll be better off with a bigger battery bank, eliminating the need to use this timer/charger arrangement. Still, I can think of two benefits of this plan:
1. Batteries will tend to be kept at a higher SOC, extending their life.
2. This process is similar to the experience of those who actually live off-grid. Those who live off-grid usually have a secondary source of electricity, a generator perhaps. When lack of sunshine necessitates the use of the generator, using it for brief periods to charge batteries is the best strategy. In my case, I’ve substituted grid-supplied power for generator-derived power. Living off-grid is my ultimate goal, and this experience helps me learn more about that.
John
Wednesday, March 05, 2008
PV System Automation Test
It was the best of times, it was the worst of times…
Those words from a Charles Dickens novel came to mind as I reviewed the data from my PV system automation test. The test was conducted during the last week in February, and sunlight on the solar panels was a rare occurrence here in Illinois. While it would have been great to see loads powered by the sun during the day, and batteries fully charged before sunset, that hasn’t happened much lately. The past few weeks have seen rain, snow, sleet, and mostly overcast skies. This was the worst of times for sunlight, resulting in the lowest PV system electricity production of the year.
Ironically, the bad weather makes this one of the best times to test the PV system. It is important to know how the system responds to these, the worst-case conditions. It will be equally important to see how the system responds to best-case conditions, a sunny summer day.
Without proper care, batteries can be ruined or weakened. The Charge Controller prevents over-charging, but does nothing to protect the batteries from over-discharging or chronic under-charging. The automation described here is an attempt to do just that. With the new automation, system loads are applied and removed depending on the battery state of charge (SOC). On a typical day, the sun shines on the panels and battery voltage rises as the batteries are charged. Once the battery voltage reaches a preset “high voltage threshold”, a relay closes. This relay connects the system to an electrical load, such as a refrigerator or freezer. The PV panels power the load, and can charge the batteries at the same time if the load is not too large. When the solar panels are unable to meet the demands of the load, at night for instance, the batteries must supply power to the load instead, causing battery voltage to decline. Once the battery voltage drops to match the “low voltage threshold” setting, the relay opens and the load is removed. Because the load is removed, the batteries do not discharge any further. To maximize battery longevity, the depth of discharge (DOD) should not exceed 20%. The automation described here amounts to little more than the low and high battery voltage threshold settings.
Using a data logger, battery voltage readings were taken every 30 minutes for several days. Battery voltage increases during the day, even on cloudy days, as a result of charge current from the solar panels. Battery voltage decreases at night, due to the loads. When charted, these voltage differences are seen as hills and valleys on the graph. For this test, a refrigerator and a freezer were used as the load. Since those devices have compressors that switch on and off at random times, the load was not constant throughout the duration of the test. When one or both of the compressors turn on, the heavy electrical load causes battery voltage to sag a little. This is followed by a voltage increase when one or both of the compressors turn off. The resulting voltage dips and peaks result in jagged lines on the graph.
Interpreting the data and making adjustments:
Data from the first set of tests suggests that battery damage could occur as a result of chronic undercharging. Although this was the result of a lack of sunshine, raising the high voltage threshold setting will help to ensure that the batteries are not chronically undercharged.
A high motor-starting current might result in a temporary voltage sag that can cause the relay to deenergize prematurely. Setting a high to low threshold delay will prevent this from occurring.
Although there was no evidence of false-triggering, a voltage spike could cause the relay to energize prematurely. This can be prevented by setting a low to high threshold delay.
It seems that the best strategy will be to apply different settings for summer and winter. Specifically, the high voltage threshold setting may be lowered in the summer, since more sunlight is expected. More sunlight will reduce the chance of chronic undercharging.
For now, the automation settings will be changed as indicated below:
Name and Purpose of Setting -- -- -- -- -- Present Setting -- New
H. Voltage Threshold - Energize relay --- 13.65 volts ----- 13.85 v
L. Voltage Threshold - Deenergize relay - 12.00 volts ----- 12.00 v
High to low threshold delay -- -- -- -- -- -- - Not set ------- 10 sec.
Low to high threshold delay -- -- -- -- -- -- - Not set ------- 2 sec.
This was the first of a series of tests that will be conducted throughout the year. I’ll continue to gather data and adjust the automation settings as necessary. Once I have sufficient data, I’ll list the setting changes I’ve deemed appropriate for the different seasons. Up to this point, the data I’ve gathered has been during a period of unusually bad weather.
It’s interesting to note that before automating the system, the average daily output was less than 0.5kwh. The system was capable of producing more, but I wasn't there to turn it on and off. Since I’ve automated the system I frequently get more than 1.2kwh from it. Unused energy from the sun is wasted energy, and I’m pleased with the results of this upgrade. I’ll post additional performance data as I get it. Check back later.
The settings described here are applied to the Morningstar Relay Driver, using MSView software. More information can be found on the Morningstar website: http://www.morningstarcorp.com
John
Those words from a Charles Dickens novel came to mind as I reviewed the data from my PV system automation test. The test was conducted during the last week in February, and sunlight on the solar panels was a rare occurrence here in Illinois. While it would have been great to see loads powered by the sun during the day, and batteries fully charged before sunset, that hasn’t happened much lately. The past few weeks have seen rain, snow, sleet, and mostly overcast skies. This was the worst of times for sunlight, resulting in the lowest PV system electricity production of the year.
Ironically, the bad weather makes this one of the best times to test the PV system. It is important to know how the system responds to these, the worst-case conditions. It will be equally important to see how the system responds to best-case conditions, a sunny summer day.
Without proper care, batteries can be ruined or weakened. The Charge Controller prevents over-charging, but does nothing to protect the batteries from over-discharging or chronic under-charging. The automation described here is an attempt to do just that. With the new automation, system loads are applied and removed depending on the battery state of charge (SOC). On a typical day, the sun shines on the panels and battery voltage rises as the batteries are charged. Once the battery voltage reaches a preset “high voltage threshold”, a relay closes. This relay connects the system to an electrical load, such as a refrigerator or freezer. The PV panels power the load, and can charge the batteries at the same time if the load is not too large. When the solar panels are unable to meet the demands of the load, at night for instance, the batteries must supply power to the load instead, causing battery voltage to decline. Once the battery voltage drops to match the “low voltage threshold” setting, the relay opens and the load is removed. Because the load is removed, the batteries do not discharge any further. To maximize battery longevity, the depth of discharge (DOD) should not exceed 20%. The automation described here amounts to little more than the low and high battery voltage threshold settings.
Using a data logger, battery voltage readings were taken every 30 minutes for several days. Battery voltage increases during the day, even on cloudy days, as a result of charge current from the solar panels. Battery voltage decreases at night, due to the loads. When charted, these voltage differences are seen as hills and valleys on the graph. For this test, a refrigerator and a freezer were used as the load. Since those devices have compressors that switch on and off at random times, the load was not constant throughout the duration of the test. When one or both of the compressors turn on, the heavy electrical load causes battery voltage to sag a little. This is followed by a voltage increase when one or both of the compressors turn off. The resulting voltage dips and peaks result in jagged lines on the graph.
Interpreting the data and making adjustments:
Data from the first set of tests suggests that battery damage could occur as a result of chronic undercharging. Although this was the result of a lack of sunshine, raising the high voltage threshold setting will help to ensure that the batteries are not chronically undercharged.
A high motor-starting current might result in a temporary voltage sag that can cause the relay to deenergize prematurely. Setting a high to low threshold delay will prevent this from occurring.
Although there was no evidence of false-triggering, a voltage spike could cause the relay to energize prematurely. This can be prevented by setting a low to high threshold delay.
It seems that the best strategy will be to apply different settings for summer and winter. Specifically, the high voltage threshold setting may be lowered in the summer, since more sunlight is expected. More sunlight will reduce the chance of chronic undercharging.
For now, the automation settings will be changed as indicated below:
Name and Purpose of Setting -- -- -- -- -- Present Setting -- New
H. Voltage Threshold - Energize relay --- 13.65 volts ----- 13.85 v
L. Voltage Threshold - Deenergize relay - 12.00 volts ----- 12.00 v
High to low threshold delay -- -- -- -- -- -- - Not set ------- 10 sec.
Low to high threshold delay -- -- -- -- -- -- - Not set ------- 2 sec.
This was the first of a series of tests that will be conducted throughout the year. I’ll continue to gather data and adjust the automation settings as necessary. Once I have sufficient data, I’ll list the setting changes I’ve deemed appropriate for the different seasons. Up to this point, the data I’ve gathered has been during a period of unusually bad weather.
It’s interesting to note that before automating the system, the average daily output was less than 0.5kwh. The system was capable of producing more, but I wasn't there to turn it on and off. Since I’ve automated the system I frequently get more than 1.2kwh from it. Unused energy from the sun is wasted energy, and I’m pleased with the results of this upgrade. I’ll post additional performance data as I get it. Check back later.
The settings described here are applied to the Morningstar Relay Driver, using MSView software. More information can be found on the Morningstar website: http://www.morningstarcorp.com
John
Monday, February 25, 2008
I've Automated my Off-Grid PV System
Because over-discharging batteries can ruin them, I only connect loads to my photovoltaic (PV) system on weekends and evenings, and only when I’m home and awake so that I can carefully monitor battery voltage. I’ve been getting 10 to 12kwh of production out of my system each month, but knowing that it’s capable of producing 45kwh or more, I’ve been looking forward to this upgrade.
When the solar panels don’t provide enough power to satisfy the AC load, energy stored in the batteries is used instead. This will occur at night, of course, but also when it’s cloudy during the day. Under these conditions battery voltage will continue to decline, and eventually the inverter will stop working. My inverter stops functioning at about 11.6 volts. Allowing the voltage to dip that low can damage the batteries, and the risk is even greater if the batteries are not recharged quickly.
Shown below is a simplified diagram of my system before the upgrade.

This is my system after the upgrade.

I’ve programmed the voltage-controlled-switch to close a relay when battery voltage is above 13.75 volts. Closing the relay switches the DC to AC inverter on. The AC transfer switch is wired to use AC from the inverter as the default, only switching to grid-supplied AC when the inverter is switched off. The voltage-controlled-switch opens the relay when battery voltage drops to 11.95 volts. When the relay opens, the inverter is switched off and the AC transfer switch connects the load to grid-supplied AC. Once the load is removed, battery voltage will gradually rise. However, the voltage-controlled-switch will not close the relay until battery voltage once again reaches 13.75 volts.
I currently have a data logger connected to measure battery voltage. If I find that the battery does not fully recharge during the day, I’ll reprogram the voltage-controlled-switch. Likewise, I may need to reprogram the low-voltage threshold for better efficiency or battery protection. I’ll determine the appropriate settings after reviewing a few days worth of data logger readings.
Shown below is the complete system, with the new components.

The voltage-controlled-switch is the device at the top-left of the picture. It’s called a “Relay Driver”, and it can be programmed for four independent functions. It gets its information (battery voltage in this case), from the TriStar Charge Controller. Mounted just to the right of the relay driver is the automatic AC transfer switch. AC from the inverter, and AC from the power grid feed in to this device, and the selected AC source is applied to the AC outlet just below the transfer switch.
The off-white aluminum box mounted just below the relay driver contains the relay. For convenience, relay inputs and outputs are wired to the terminal blocks. A relay-override switch is mounted near the bottom of the relay box. To facilitate future expansion, I’ve installed two additional relays, and an LED (barely visible on the top of the box). I’ve wired one of the relays for AC. I have some expansion ideas that I’m kicking around, and I have some ideas to improve efficiency.
I’ll post additional details after I’ve had a chance to see how the system performs. Check back for an update.
John
When the solar panels don’t provide enough power to satisfy the AC load, energy stored in the batteries is used instead. This will occur at night, of course, but also when it’s cloudy during the day. Under these conditions battery voltage will continue to decline, and eventually the inverter will stop working. My inverter stops functioning at about 11.6 volts. Allowing the voltage to dip that low can damage the batteries, and the risk is even greater if the batteries are not recharged quickly.
Shown below is a simplified diagram of my system before the upgrade.

This is my system after the upgrade.

I’ve programmed the voltage-controlled-switch to close a relay when battery voltage is above 13.75 volts. Closing the relay switches the DC to AC inverter on. The AC transfer switch is wired to use AC from the inverter as the default, only switching to grid-supplied AC when the inverter is switched off. The voltage-controlled-switch opens the relay when battery voltage drops to 11.95 volts. When the relay opens, the inverter is switched off and the AC transfer switch connects the load to grid-supplied AC. Once the load is removed, battery voltage will gradually rise. However, the voltage-controlled-switch will not close the relay until battery voltage once again reaches 13.75 volts.
I currently have a data logger connected to measure battery voltage. If I find that the battery does not fully recharge during the day, I’ll reprogram the voltage-controlled-switch. Likewise, I may need to reprogram the low-voltage threshold for better efficiency or battery protection. I’ll determine the appropriate settings after reviewing a few days worth of data logger readings.
Shown below is the complete system, with the new components.

The voltage-controlled-switch is the device at the top-left of the picture. It’s called a “Relay Driver”, and it can be programmed for four independent functions. It gets its information (battery voltage in this case), from the TriStar Charge Controller. Mounted just to the right of the relay driver is the automatic AC transfer switch. AC from the inverter, and AC from the power grid feed in to this device, and the selected AC source is applied to the AC outlet just below the transfer switch.
The off-white aluminum box mounted just below the relay driver contains the relay. For convenience, relay inputs and outputs are wired to the terminal blocks. A relay-override switch is mounted near the bottom of the relay box. To facilitate future expansion, I’ve installed two additional relays, and an LED (barely visible on the top of the box). I’ve wired one of the relays for AC. I have some expansion ideas that I’m kicking around, and I have some ideas to improve efficiency.
I’ll post additional details after I’ve had a chance to see how the system performs. Check back for an update.
John
Thursday, January 24, 2008
Load Switcher Project Update
My goal is to get as much as I can from my solar photovoltaic system, and at the same time protect my batteries from over-discharging. I want to be able to use battery power as much as possible, and only switch to grid-supplied AC when battery state of charge (SOC) has declined to a preset value. The first step, the installation of a “Transfer Switch”, has already been done. Next, I’ll need a way to switch my inverter on and off, depending upon the battery state of charge (SOC) at any given time. When the inverter is switched on, the load is powered by the batteries. When the inverter is switched off, the transfer switch automatically connects the load to grid-supplied AC power instead.
I’ve considered three ways to accomplish the task, and thought about the pro’s and con’s of each:
1. A simple circuit that allows precise control of low and high voltage threshold settings to open and close a relay.
A considerable amount of time is needed for development and testing. Cost is also an issue. While the finished product may do the job, it may not be as efficient as a commercially available product that can perform the same function. This device will not be easily expandable.
2. A microprocessor-based controller that can easily be reprogrammed to open and close a relay based on battery voltage.
Hardware and software development time will be tremendous, unless I go with a commercially available product, but that will be expensive. However, the result will be a product that performs a simple task at first, but can be easily expanded to include many more functions. A real-time-clock can be included, greatly enhancing control, monitoring, and logging functionality.
3. A commercially available product that can be programmed or configured to connect and disconnect the load based on battery voltage.
The one-time cost will be significant, but the system will be up and running in a short time. Expansion capabilities are considerable, but do not include a real-time-clock (RTC). An RTC would be useful because I will want to take advantage of low night time electric rates to run a battery charger.
I’ve already built a simple device, but it’s going to take more time to get it working as well as I would like. Meanwhile, I’m not making the most of the available energy from the sun right now. Building a microprocessor-based device would take even longer. I want to get things going fairly quickly, and the time I have available for this project is limited. With these things in mind, I’ve decided to go with option number 3. Specifically, I’m considering the Morningstar Relay Driver and MSView software.
Calling the Morningstar product a “Relay Driver” is, in my opinion, a big mistake, and perhaps the reason I overlooked this option earlier. The name implies that its function is simply to turn on and off one or more relays, based on external signals. In reality, it does much more than that. Using the MSView software, the device can be programmed to perform a variety of functions. Most importantly to me, it can control a relay based on high and low battery voltage setpoints. I’ll use that relay to turn my inverter on when batteries are at a high SOC, and switch it off when battery voltage is low, with the transfer switch selecting the appropriate source of AC for the loads. I’ll use just one relay at first, but will add functionality later. The Morningstar Relay Driver can control up to four relays.
Once I get load control set up and tested, I probably want to control a battery charger. I’ll use the Morningstar Relay Driver to close a relay based on battery voltage, and I’ll use a timer to only allow the charger to be powered-up when electric rates are low.
Shown below is my simple circuit in the testing phase. I’ll soon be abandoning this project in favor of the Morningstar Relay Driver.

John
I’ve considered three ways to accomplish the task, and thought about the pro’s and con’s of each:
1. A simple circuit that allows precise control of low and high voltage threshold settings to open and close a relay.
A considerable amount of time is needed for development and testing. Cost is also an issue. While the finished product may do the job, it may not be as efficient as a commercially available product that can perform the same function. This device will not be easily expandable.
2. A microprocessor-based controller that can easily be reprogrammed to open and close a relay based on battery voltage.
Hardware and software development time will be tremendous, unless I go with a commercially available product, but that will be expensive. However, the result will be a product that performs a simple task at first, but can be easily expanded to include many more functions. A real-time-clock can be included, greatly enhancing control, monitoring, and logging functionality.
3. A commercially available product that can be programmed or configured to connect and disconnect the load based on battery voltage.
The one-time cost will be significant, but the system will be up and running in a short time. Expansion capabilities are considerable, but do not include a real-time-clock (RTC). An RTC would be useful because I will want to take advantage of low night time electric rates to run a battery charger.
I’ve already built a simple device, but it’s going to take more time to get it working as well as I would like. Meanwhile, I’m not making the most of the available energy from the sun right now. Building a microprocessor-based device would take even longer. I want to get things going fairly quickly, and the time I have available for this project is limited. With these things in mind, I’ve decided to go with option number 3. Specifically, I’m considering the Morningstar Relay Driver and MSView software.
Calling the Morningstar product a “Relay Driver” is, in my opinion, a big mistake, and perhaps the reason I overlooked this option earlier. The name implies that its function is simply to turn on and off one or more relays, based on external signals. In reality, it does much more than that. Using the MSView software, the device can be programmed to perform a variety of functions. Most importantly to me, it can control a relay based on high and low battery voltage setpoints. I’ll use that relay to turn my inverter on when batteries are at a high SOC, and switch it off when battery voltage is low, with the transfer switch selecting the appropriate source of AC for the loads. I’ll use just one relay at first, but will add functionality later. The Morningstar Relay Driver can control up to four relays.
Once I get load control set up and tested, I probably want to control a battery charger. I’ll use the Morningstar Relay Driver to close a relay based on battery voltage, and I’ll use a timer to only allow the charger to be powered-up when electric rates are low.
Shown below is my simple circuit in the testing phase. I’ll soon be abandoning this project in favor of the Morningstar Relay Driver.

John
Tuesday, January 01, 2008
My Solar Electric System and New Year's Resolution
Plans for my off-grid photovoltaic (PV) system have been pretty much the same for the past two years; enlarge the system and use more of the available power. I’ll continue to do both of these things in 2008, but I’ll also make a major change in the way I use energy from the system. In the past I’ve carefully monitored battery voltage and manually switched loads on and off. By doing this manually I not only miss opportunities to use energy from the sun, I risk damaging the batteries by over discharging them. To resolve these problems, and to relieve myself of the chore of manually switching between power sources, I plan to automate this task.
I’ll automate the switching on and off of loads using ideas from a recent post, “Getting the Most from an Off-grid System”. I’ve decided to use a transfer switch, and a circuit of my own design, to accomplish this task. Refer to the drawing below:

How it works:
The Transfer Switch is configured to use power from the inverter as the primary source of AC power for the load, only switching to grid-supplied AC power when the inverter is switched off. The inverter will be automatically switched on when the battery state of charge (SOC) is high, and switched off when the battery SOC has dropped to a predetermined value.
Thumbwheel switches, precision resistors, and a regulated reference voltage allow precise settings of the “Low Voltage Threshold” and the “High Voltage Threshold”. The thumbwheel switches and resistors create two voltage dividers. The output of the low voltage threshold voltage divider is equal to the low voltage threshold thumbwheel setting, and the output from the high voltage threshold divider is equal to the high voltage threshold thumbwheel setting. These two reference voltages are fed into two comparators.
When the battery voltage falls below the “Low Voltage Threshold” setting, comparator 1 changes state, triggering the Flip Flop, and the inverter is turned off. The Transfer Switch senses the loss of AC voltage from the inverter and switches the load to grid-supplied AC power.
When the battery voltage rises above the “High Voltage Threshold” setting, comparator 2 changes state, resetting the Flip Flop, and the inverter is switched on. The Transfer Switch senses the AC voltage from the inverter, and connects the load to the inverter.
Initially, I’ll set the low voltage threshold voltage to 12.25 volts. That voltage represents an approximate 75% state of charge (SOC). I’ll set the high voltage threshold at 14.75 volts, ensuring that the batteries are fully charged before allowing them to power the load.
It’s interesting to note that the battery voltage will not reach the high voltage threshold setting unless the sun is shining and the batteries have been fully charged. I’ll experiment with other settings in an attempt to improve system efficiency without endangering the batteries.
Benefits:
Since I’m not able to constantly monitor battery voltage, I’ve missed opportunities to use as much of the free power that my solar electric system is capable of providing. Instead, I disconnect the load when I think that the battery SOC may fall below 80%. Once I’ve implemented this plan, I’ll be able to use more of the available power from the system without the fear of damaging the batteries. Additionally, this automation will help to keep the batteries at a high enough SOC to ensure the availability of power in the event of a grid power failure.
With a Twist:
Because of a utility company plan that results in low rates at night, I’m thinking about storing energy in a larger battery bank at night when rates are low, and using that energy to power loads during the day when utility rates are high. And because my PV array is still small, I’m thinking about using a battery charger to supplement the charging that now comes from my PV array. The charger will be turned on via a timer in the early morning hours when rates are lowest, and turned off later in the morning before rates go up. When cloudy conditions limit the amount of charging my PV panels are able to provide, the battery charger will take up the slack and the batteries should be fully charged each morning. Confident that I’ll have plenty of stored energy in the morning, I’ll add more to the daytime battery load, and therefore save money on my electric bill.
With the charger switched on during the early morning hours, it’s likely that the batteries will quickly become fully charged. When that happens, the inverter will once again be used to power the load. Because the charger is still connected, and switched on via the timer, it too will provide power to the load. However, this will occur in the early morning hours when electric rates are low, and I’ll be taking advantage of the lowest rates, cutting my electric bill.
The graph below shows the expected results over a 24 hour period. As a result of charging from the PV panels during the day, and charging from the battery charger at night, the load will be powered by the batteries most of the time.

John
I’ll automate the switching on and off of loads using ideas from a recent post, “Getting the Most from an Off-grid System”. I’ve decided to use a transfer switch, and a circuit of my own design, to accomplish this task. Refer to the drawing below:

How it works:
The Transfer Switch is configured to use power from the inverter as the primary source of AC power for the load, only switching to grid-supplied AC power when the inverter is switched off. The inverter will be automatically switched on when the battery state of charge (SOC) is high, and switched off when the battery SOC has dropped to a predetermined value.
Thumbwheel switches, precision resistors, and a regulated reference voltage allow precise settings of the “Low Voltage Threshold” and the “High Voltage Threshold”. The thumbwheel switches and resistors create two voltage dividers. The output of the low voltage threshold voltage divider is equal to the low voltage threshold thumbwheel setting, and the output from the high voltage threshold divider is equal to the high voltage threshold thumbwheel setting. These two reference voltages are fed into two comparators.
When the battery voltage falls below the “Low Voltage Threshold” setting, comparator 1 changes state, triggering the Flip Flop, and the inverter is turned off. The Transfer Switch senses the loss of AC voltage from the inverter and switches the load to grid-supplied AC power.
When the battery voltage rises above the “High Voltage Threshold” setting, comparator 2 changes state, resetting the Flip Flop, and the inverter is switched on. The Transfer Switch senses the AC voltage from the inverter, and connects the load to the inverter.
Initially, I’ll set the low voltage threshold voltage to 12.25 volts. That voltage represents an approximate 75% state of charge (SOC). I’ll set the high voltage threshold at 14.75 volts, ensuring that the batteries are fully charged before allowing them to power the load.
It’s interesting to note that the battery voltage will not reach the high voltage threshold setting unless the sun is shining and the batteries have been fully charged. I’ll experiment with other settings in an attempt to improve system efficiency without endangering the batteries.
Benefits:
Since I’m not able to constantly monitor battery voltage, I’ve missed opportunities to use as much of the free power that my solar electric system is capable of providing. Instead, I disconnect the load when I think that the battery SOC may fall below 80%. Once I’ve implemented this plan, I’ll be able to use more of the available power from the system without the fear of damaging the batteries. Additionally, this automation will help to keep the batteries at a high enough SOC to ensure the availability of power in the event of a grid power failure.
With a Twist:
Because of a utility company plan that results in low rates at night, I’m thinking about storing energy in a larger battery bank at night when rates are low, and using that energy to power loads during the day when utility rates are high. And because my PV array is still small, I’m thinking about using a battery charger to supplement the charging that now comes from my PV array. The charger will be turned on via a timer in the early morning hours when rates are lowest, and turned off later in the morning before rates go up. When cloudy conditions limit the amount of charging my PV panels are able to provide, the battery charger will take up the slack and the batteries should be fully charged each morning. Confident that I’ll have plenty of stored energy in the morning, I’ll add more to the daytime battery load, and therefore save money on my electric bill.
With the charger switched on during the early morning hours, it’s likely that the batteries will quickly become fully charged. When that happens, the inverter will once again be used to power the load. Because the charger is still connected, and switched on via the timer, it too will provide power to the load. However, this will occur in the early morning hours when electric rates are low, and I’ll be taking advantage of the lowest rates, cutting my electric bill.
The graph below shows the expected results over a 24 hour period. As a result of charging from the PV panels during the day, and charging from the battery charger at night, the load will be powered by the batteries most of the time.

John
Friday, December 21, 2007
Getting the Most from a Small Off-Grid PV System
Although my off-grid system is small, I’m proud to say that by using it I’m reducing the amount of CO2 that would otherwise be released into the atmosphere and I’m reducing my electric bill. However, it’s a challenge to use as much solar-generated energy as possible, while still being gentle to the batteries. Allowing too much power to be sucked out of the batteries each night will shorten their life. On the other hand, I don’t want to under-use the system by not using enough of the available energy each day. Unused energy is wasted energy. The purpose of this article is to explore strategies for getting the most from a small off-grid PV system.
Strategy #1
A 100-watt solar panel might produce 500-watt/hours of electricity on a sunny day. But, due to system inefficiencies, it’s likely that only about 300-watt/hours of energy will make it to the load. Using solar-generated energy during peak sunlight hours is one way to improve efficiency. When power from the solar panels goes straight to the inverter, overall efficiency is much greater, since the losses associated with storing and retrieving electrical energy in batteries are eliminated.
The AC load can be plugged into the PV system’s inverter during the day and then to grid-supplied power at night, or switched automatically via a timer as illustrated below. A refrigerator or freezer is an ideal load for this scenario, since the amount of electricity required is about the same from day-to-day. The timer can be adjusted to match the power generated by the PV system to the power required by the load.

Strategy #2
A no-cost way to squeeze every available electron from an off-grid system is to constantly monitor battery voltage, disconnecting the load when the battery falls to a certain level, and reconnecting it when the battery is once again fully charged. Obviously, monitoring the system 24 hours a day is not practical. However, most DC to AC inverters include a low-battery “alarm” feature. The alarm sounds when the battery voltage drops below a certain level, eliminating the need for constant monitoring. Still, listening for an alarm is only a modest improvement over constant monitoring. No one wants to respond to an alarm in the middle of the night. Another drawback of this strategy is that the low-voltage alarm level is usually not adjustable. Typically, the alarm threshold voltage is about 10.6 volts (for a 12-volt inverter), which, depending upon battery type, translates to about a 75% depth of discharge. Most inverters will shut-down when battery voltage falls a little below the alarm threshold. While this strategy will work to a certain extent, you shouldn’t allow your battery state of charge (SOC) to fall that low. Allowing battery voltage to drop to those depths on a frequent basis will shorten the life of the battery. This strategy is not recommended on a day-to-day basis, but could be used in emergency situations, such as a grid power failure.
Strategy #3
To automate the process of disconnecting and reconnecting the load based on battery voltage, a charge controller with built-in low voltage disconnect (LVD) capabilities can be used. An LVD-capable charge controller is a great strategy for unattended systems, such as a weekend cottage. If a load is accidentally left on, the battery will be protected.
Although this is a good solution for applications where power to the load flows through the charge controller, it is not viable in systems where power to the load does not. The input current of an inverter is usually higher that the charge controller can handle, making it necessary to connect the inverter directly to the battery.
The diagram below shows typical wiring for a small, off-grid, PV system. Notice that the inverter is connected directly to the battery, and therefore will not be shut down when the Charge Controller’s low voltage disconnect kicks in. Only the DC output from the Charge Controller will be shut down in this scenario. Battery voltage will continue to decline (because of the AC load), even after the Low Voltage Disconnect kicks in. At some point the inverter will stop functioning. This is not a good strategy unless you’re only using the DC output of the Charge Controller to power a load, or unless you’re carefully monitoring the battery voltage while powering an AC load.

Strategy #4
Some Charge Controllers can be configured as “Load Controllers”, providing another strategy for getting the most from a small system. A Load Controller does not replace a Charge Controller, it is an add-on to the system. An advantage of using a Load Controller is that disconnect and reconnect thresholds can be precisely set. Settings are determined by the type of batteries, and by the size of the load. When properly set, the disconnect set-point prevents the battery from discharging too much, and the reconnect set-point value is high enough to ensure that the battery is not damaged by chronic undercharging. In other words, the disconnect and reconnect settings are optimized. The extra hardware does, of course, add considerable cost to the system.
Shown below is a typical application of a Load Controller. In the example, the Load Controller uses the batteries as the primary source of energy, but switches to a secondary source of energy when the batteries are depleted to a preset level. Once the batteries are recharged, they are again used to power the load. The beauty of this system is that it uses as much “free” energy from the sun as is available, only using a more costly source of energy when necessary.

Strategy #5
Those with electronics skills may consider the solution outlined below. This diagram represents a simple circuit that can replace the “Load Controller” and relay in the diagram above. Disconnect and reconnect voltage levels are set via two potentiometers. The potentiometers could be replaced by thumbwheel switches and precision resistors, providing better control of the threshold voltages. Notice that the relay wiring doesn’t allow AC from the inverter and AC from the power grid to be applied to the load simultaneously. Allowing that to happen would probably result in damage to the inverter.

Strategy #6
The battery-protecting switchover functions described above are also available in equipment designed for larger systems, but that equipment may not be appropriate for small systems. In addition to the high cost, this equipment typically uses more power for its operation than equipment designed for smaller systems. While this power drain may not be significant for a large system, it represents a significant percentage of the overall energy production of a small system.
Conclusion
In compiling this information it has been my intention to demonstrate optimization while holding down the cost. You may benefit from using one or more of the strategies outlined here. I welcome other suggestions for accomplishing the task.
John
Strategy #1
A 100-watt solar panel might produce 500-watt/hours of electricity on a sunny day. But, due to system inefficiencies, it’s likely that only about 300-watt/hours of energy will make it to the load. Using solar-generated energy during peak sunlight hours is one way to improve efficiency. When power from the solar panels goes straight to the inverter, overall efficiency is much greater, since the losses associated with storing and retrieving electrical energy in batteries are eliminated.
The AC load can be plugged into the PV system’s inverter during the day and then to grid-supplied power at night, or switched automatically via a timer as illustrated below. A refrigerator or freezer is an ideal load for this scenario, since the amount of electricity required is about the same from day-to-day. The timer can be adjusted to match the power generated by the PV system to the power required by the load.

Strategy #2
A no-cost way to squeeze every available electron from an off-grid system is to constantly monitor battery voltage, disconnecting the load when the battery falls to a certain level, and reconnecting it when the battery is once again fully charged. Obviously, monitoring the system 24 hours a day is not practical. However, most DC to AC inverters include a low-battery “alarm” feature. The alarm sounds when the battery voltage drops below a certain level, eliminating the need for constant monitoring. Still, listening for an alarm is only a modest improvement over constant monitoring. No one wants to respond to an alarm in the middle of the night. Another drawback of this strategy is that the low-voltage alarm level is usually not adjustable. Typically, the alarm threshold voltage is about 10.6 volts (for a 12-volt inverter), which, depending upon battery type, translates to about a 75% depth of discharge. Most inverters will shut-down when battery voltage falls a little below the alarm threshold. While this strategy will work to a certain extent, you shouldn’t allow your battery state of charge (SOC) to fall that low. Allowing battery voltage to drop to those depths on a frequent basis will shorten the life of the battery. This strategy is not recommended on a day-to-day basis, but could be used in emergency situations, such as a grid power failure.
Strategy #3
To automate the process of disconnecting and reconnecting the load based on battery voltage, a charge controller with built-in low voltage disconnect (LVD) capabilities can be used. An LVD-capable charge controller is a great strategy for unattended systems, such as a weekend cottage. If a load is accidentally left on, the battery will be protected.
Although this is a good solution for applications where power to the load flows through the charge controller, it is not viable in systems where power to the load does not. The input current of an inverter is usually higher that the charge controller can handle, making it necessary to connect the inverter directly to the battery.
The diagram below shows typical wiring for a small, off-grid, PV system. Notice that the inverter is connected directly to the battery, and therefore will not be shut down when the Charge Controller’s low voltage disconnect kicks in. Only the DC output from the Charge Controller will be shut down in this scenario. Battery voltage will continue to decline (because of the AC load), even after the Low Voltage Disconnect kicks in. At some point the inverter will stop functioning. This is not a good strategy unless you’re only using the DC output of the Charge Controller to power a load, or unless you’re carefully monitoring the battery voltage while powering an AC load.

Strategy #4
Some Charge Controllers can be configured as “Load Controllers”, providing another strategy for getting the most from a small system. A Load Controller does not replace a Charge Controller, it is an add-on to the system. An advantage of using a Load Controller is that disconnect and reconnect thresholds can be precisely set. Settings are determined by the type of batteries, and by the size of the load. When properly set, the disconnect set-point prevents the battery from discharging too much, and the reconnect set-point value is high enough to ensure that the battery is not damaged by chronic undercharging. In other words, the disconnect and reconnect settings are optimized. The extra hardware does, of course, add considerable cost to the system.
Shown below is a typical application of a Load Controller. In the example, the Load Controller uses the batteries as the primary source of energy, but switches to a secondary source of energy when the batteries are depleted to a preset level. Once the batteries are recharged, they are again used to power the load. The beauty of this system is that it uses as much “free” energy from the sun as is available, only using a more costly source of energy when necessary.

Strategy #5
Those with electronics skills may consider the solution outlined below. This diagram represents a simple circuit that can replace the “Load Controller” and relay in the diagram above. Disconnect and reconnect voltage levels are set via two potentiometers. The potentiometers could be replaced by thumbwheel switches and precision resistors, providing better control of the threshold voltages. Notice that the relay wiring doesn’t allow AC from the inverter and AC from the power grid to be applied to the load simultaneously. Allowing that to happen would probably result in damage to the inverter.

Strategy #6
The battery-protecting switchover functions described above are also available in equipment designed for larger systems, but that equipment may not be appropriate for small systems. In addition to the high cost, this equipment typically uses more power for its operation than equipment designed for smaller systems. While this power drain may not be significant for a large system, it represents a significant percentage of the overall energy production of a small system.
Conclusion
In compiling this information it has been my intention to demonstrate optimization while holding down the cost. You may benefit from using one or more of the strategies outlined here. I welcome other suggestions for accomplishing the task.
John
Subscribe to:
Posts (Atom)